Beginner's Guide to Woodworking
Last updated 28th August, 2024


Woodworking has been an essential skill practised by professionals and hobbyists for as long as any of us could remember. Not only is it an incredibly entertaining hobby, but your creations become useful to you and others and many people go on to sell their wooden products for extra money. While it takes time to hone the craft, the rewards are there to reap, and you won’t regret a moment spent practising woodwork.
In this article, we’re going to provide you with the complete beginner’s guide to woodworking. We’re going to cover the tools you’ll need, ideal first creations, and much more. If you have even a passing interest in woodworking, this will give you all the information you may need to get a start as a woodworker.
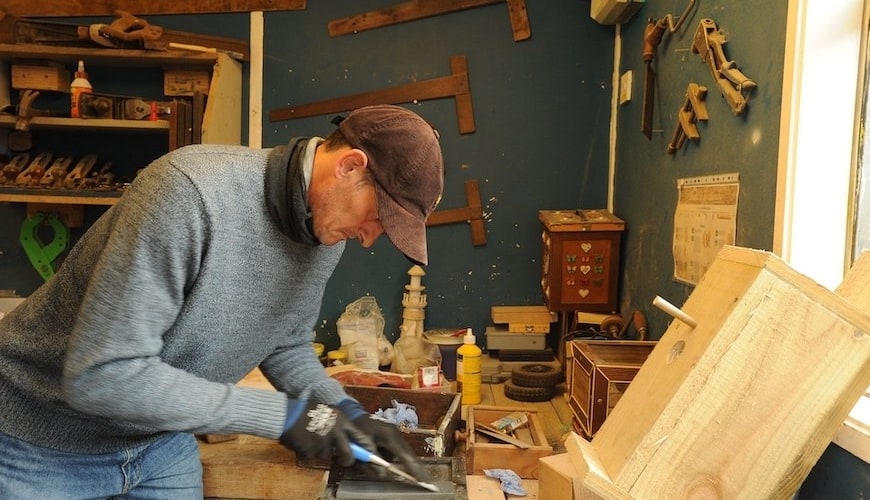
Table of Contents
What Is Woodwork?

Before we head off into the ins and outs of a Jigsaw and comb joints, let’s explore what woodwork actually is. Woodwork is defined as “the activity or skill of making items from wood, and includes cabinet making, wood carving, joinery, carpentry, and woodturning.” Essentially, if you create something using wood as the materials, you’re practising woodwork. Since the dawn of time, wood has been an essential material to build a whole host of things from homes, to transport and pretty much anything else you can think of. Elements of woodwork were even implemented in the early days of automobiles.
Creating tables, chairs, storage and tools from wood has been crucial for people throughout time, and despite technological advancements, it remains the preferred material for home furnishings to this day. Woodworking as a profession was historically a skill passed down from generation to generation, with woodworkers entering the trade through family businesses; however, a great number of people practised woodworking as hobbyists to create items for their own homes, and family and friends. In more recent times, the gig economy has seen an incredible boost as more people have the desire to earn money for themselves independent of a company or boss while choosing work that they enjoy. This has led to thousands of amateur woodworkers selling their creations through various channels like pop up shops, market stalls and, of course, the internet.
Woodworking is something that anybody can get involved in, provided that they have access to the tools and space required. Many people find at first that their finished products don’t look very professional, and some become disheartened. However, woodworking requires steady practice, and you will see significant improvements in your woodworking after only a few projects. With this in mind, many people become pretty much experts in the craft within a matter of years, depending on the difficulty of the items they are making.
What Equipment Will I Need for Woodwork?
When you start a new hobby or craft, you’ll often need to purchase some equipment to be able to start practising, and woodworking is no different. In fact, there are some tools and equipment that are integral to have access to before you start. You can also check if there are any workshops to rent in your local area, as some workshops will rent, by the hour, to people when they aren’t using the space themselves.
Here is a breakdown of the tools and equipment that you will need to be a successful woodworker:
Hand Tools
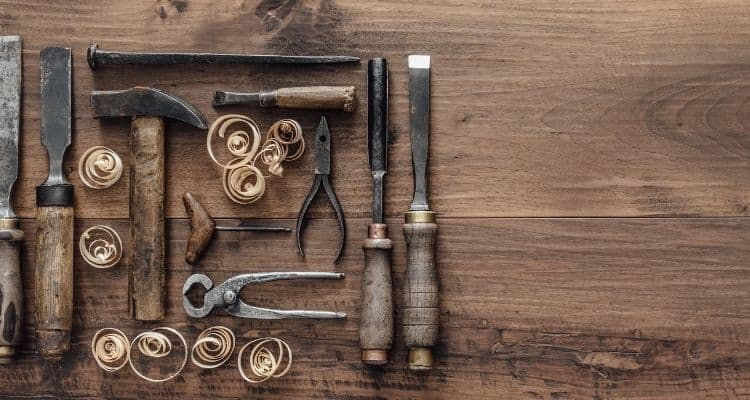
Hand tools are crucial to woodworking, even though there are a whole host of mechanical tools that are far more efficient, the accuracy of using a hand tool will always be important. Not to mention they are a fraction of the price of a mechanical tool, and with so much to purchase, every saving helps. Here is a little breakdown of the most common tools used, and the purposes they serve:
A Square
Ironically, a square isn’t square at all, but instead an L shaped tool that helps you ensure your work is aligned and straight, integral for structural integrity. Square’s will become your most indispensable tool, and you may even grow fairly attached to it.
A Plane
You will use a plane to flatten, smooth and reduce the thickness of a piece of wood, they are often seen as luxuries and not essential, but finishing work with a plane is the difference-maker between amateur and professional-looking work.
Chisels
Chisels are used to chip and cut away at pieces of wood for a variety of reasons. They look like large screwdrivers, with a sharp, angled point on the end of a rounded wooden handle. A good set of differing sized chisels will be a great tool to have at your disposal.
Marking Gauge
Imagine a judge’s gavel, but instead of sentencing criminals, it draws a perfectly accurate line, parallel to an edge. The gavel-like object has a pin in it that you can move across the material to mark out a small guide.
Saws
As a beginner, you’ll need two saws to start with. A crosscut saw for rough cutting, and then a tenor or hack saw for more delicate and intricate work. Neither saws are expensive, but both are essential.
Steel Ruler
The most important aspect of woodwork is the accuracy of your measurements. You’ll learn to measure things multiple times before committing to cutting them, there’s no going back after all, so a sturdy steel ruler is a critical piece of equipment.
Plumb Line
Plumb literally means vertical, so a plumb line is a perfectly balanced weight on a string that you can hang to find the perfect vertical line, as gravity will always find the vertical line. It will be really helpful for measuring wood before cutting to ensure a straight cut.
Power Tools
Older generations didn’t have the luxury of power tools. They used hand drills and many a laborious hour with crosscut saws. But we don’t have to suffer the same fate, and while some manual tools are crucial, we can make our woodworking much cleaner and neater with the help of technology.
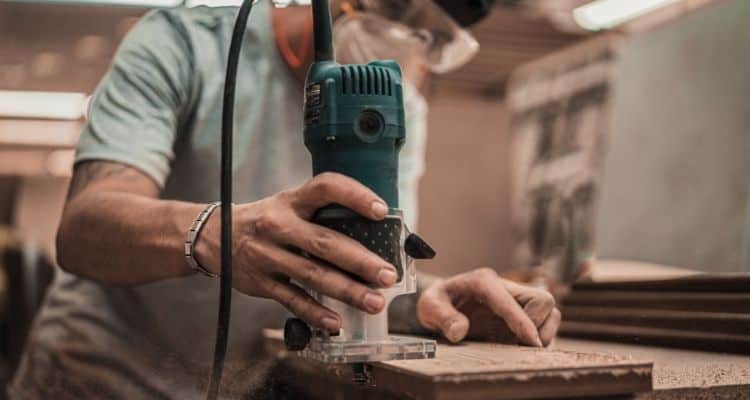
Router
A router is used to cut or gouge out holes in the wood, but despite the harsh description, it can be used to create intricate and delicate designs on finished products.
Vacuum
You’ll be generating a lot of messy sawdust while woodworking so you’ll need to invest in a strong vacuum that can handle sawdust without the filters blocking and ultimately destroying the vacuum.
Jigsaw
A jigsaw is a large powered saw that you can use to create intricate cuts through wood. The powered saw allows you to hand the material yourself with both hands, giving you complete control for the tightest of cuts.
Electric Sanders
Sanding is essential for getting the best finishes on work, or to prepare them for decoration, but using a sanding block and a piece of sandpaper is long, tough work. An electric sander will speed this process up and save you from very tired arms.
Power Drills
A power drill will come in handy much more than you may think, even if you plan on completing freestanding-only projects. Anything that involves screws will also need a quality power drill, unless you plan on spending a great deal of time screwing a hundred screw in by hand!
Circular Saw
A circular saw sits atop a table and is a powered saw that will allow you to manipulate the wood through the blades using both hands, similar to the jigsaw. However, the circular saw is more adept to taking on thicker and heavy pieces of wood, so it will save you a heap of time with the crosscut saw.
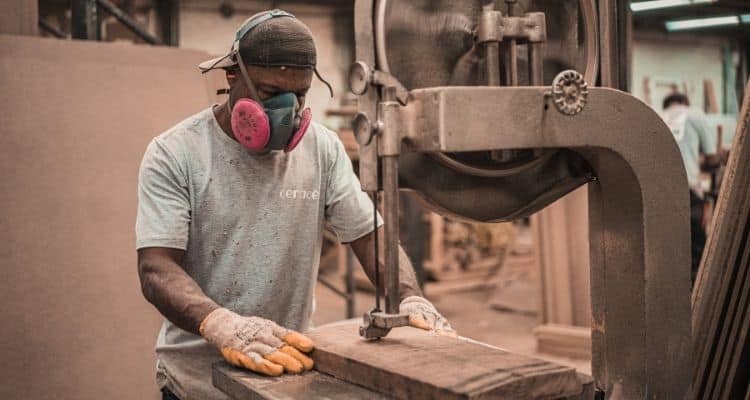
Safety Equipment

Safety should always be paramount when working with sharp and powered tools to avoid any unwanted injuries. There are a lot of hidden risks when woodworking, from loose hair, to straggling ties and wandering fingers, so it’s extremely important to ensure you have all the necessary safety equipment to hand. Here are the key items you’ll need:
Goggles
When you’re working with powered saws and creating a lot of dust in the air, your eyes will become irritated. In addition, there’s a very real chance that a chunk of material could chip away and blind you, something you really don’t want with a whirring blade in the vicinity. So, goggles will prevent all of these possibilities, and keep your vision clear while you work on your masterpiece.
Ear Defenders
Workshops can become hotbeds for noisy power tools and banging hammers, especially when you’re getting up close and personal with a circular saw, so you’ll need to protect your ears. Invest in a quality set of safe and comfortable ear defenders to ensure you’re hearing isn’t damaged by the noise.
Gloves
When you’re working with different materials, like rough wood, to avoid cuts and splinters, you should don a pair of gloves. They’re also helpful when your hammering pins and nails, and you’ll wish you had a pair on if you accidentally scrape your knuckles with sandpaper!
First Aid Kit
Sometimes accidents are just unavoidable, so prepare for the worst with a first aid kit on hand. You won’t need an extensive collection of items, but some plasters, cleaning liquids, bandages and tapes will be really useful should you ever need them.
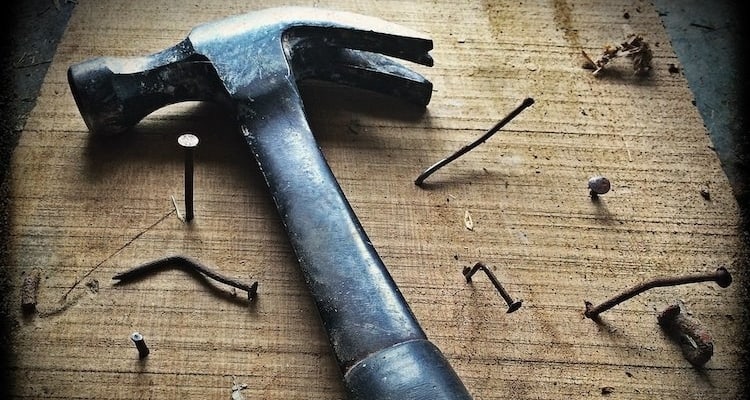
How to Use Tools Safely
The majority of accidents happen due to a lack of knowledge on how to handle or use tools, and dips in concentration. To combat this, we’ve provided a list of safety tips that will help to keep you safe in the workshop and help to avoid any injuries.
- Regularly inspect your tools and equipment to ensure that they are in good condition and ready for use. If you find them to not be in satisfactory condition, replace them or repair them!
- Dress appropriately for woodworking by keeping all ties, jewellery, scarves and other loose articles free from your workspace.
- Use the correct tools for the job, even if you think you could save some time and effort with the wrong tool. For example, don’t try to knock a nail into your work with a wrench because your hammer is on the other side of the workshop; it may backfire.
- Keep floors and workspaces clean and tidy to avoid any trips and slips while working. Falling over with a saw in your hand, for example, could spell disaster.
- Take care when working with power tools, and always switch them off at the power source when changing drill bits or blades!
- Minimise distractions in the workplace to help maintain concentration. A quiet radio is more than adequate to fill the silence, but loud music or TV’s can be very distracting.
What Space Will I Need for Woodwork?
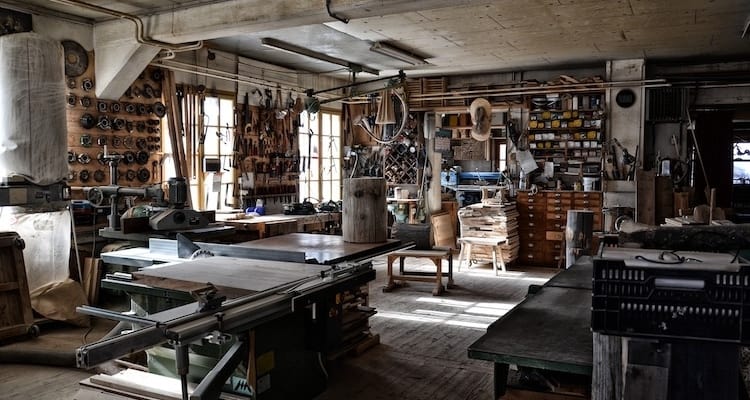
The space required for your workspace greatly varies depending on the type of projects you’re aiming to attempt. If you want to build a grand rowing boat, then using the small shed at the bottom of the garden, probably isn’t the best idea. Contrastingly, if you’re a woodworking hobbyist that enjoys building toys, boxes and birdhouses, there isn’t much point in renting a 500sqft shop!
Sit down and think about what project you want to complete in the first year or so of being a woodworker, then think about the tools and equipment you’ll need, and then you’ll get a good feel for the amount of space you’ll need. If you’re only planning on making small items with hand tools and small power tools, a shed or garage will more than suffice. For these sized spaces, ensure you have an ample sized woodworking table, woodworking bench and vice, along with storage for your tools and your projects. You could convert rooms inside your home into small workspaces, but we wouldn’t suggest them as a great option. This due to the amount of dust, noise and sometimes fumes that are generated from woodworking.
If you think you’re going to be attempting larger scale projects that require more advanced equipment, you could consider an extension to your garage if that is a possibility, or even renting a workspace large enough for all the equipment you need. If you rent a space, you’ll be able to set it up as your own, allowing you to progress quickly as a woodworker. This may be a really good option if you want to pursue woodworking as a career, as you will already have the facilities when your business starts to grow.
What Wood Should I Use?

There are numerous different types of wood available to you for woodworking. They have many different purposes, properties, positives and drawbacks. Woods for woodworking are split into hardwoods and softwoods, although this doesn’t actually mean that the softwood is any weaker than hardwood.
Firstly, it’s important to note that woods differ in price. Usually, softwoods are cheaper than hardwoods as the trees that they are taken from are coniferous, meaning they grow fast and straight. Hardwoods are more expensive than softwoods, but they are generally of higher quality, with rich colours and stunning patterns. As a beginner, the best wood to use is probably Pine. We’ll go into far more detail about all the woods and their properties in the next section, but Pine is a good starting point as it’s cheap, easy to find and easy to work with.
Types of Softwood
Cedar
Cedar, or Western Cedar as you’re more likely to encounter, is a softwood that has a deep reddish colour to it. On a softness scale of 1-4 (1 being the softest), it stands at 1. Western Cedar has a slightly aromatic smell to it and features a straight grain throughout. You’ll see this wood used mostly around outdoor projects like decking, outdoor furniture and the exteriors of buildings as Cedar handles damp environments very well without the worry of rotting. Cedar is a very affordable wood and costs around £10 for a sheet around a meter in length and 0.2m wide.
Fir
Again, this softwood has a reddish tint to it, but comes in much stronger than Cedar on the chart, scoring 4. The grain on Fir wood isn’t particularly exciting, so people tend to use this wood when they plan to paint over it. Fir is more expensive than Cedar, costing around £28 for a sheet a meter in length and 0.2m wide.
Pine
Pine, as we mentioned earlier, is the most versatile wood to use as a beginner and the easiest to work with. The softness score depends on the type you buy, but each of them is soft enough to carve into, so Pine is a genuine softwood. Pine is perfect for the beginner and offers the best scope for improvement while you’re still honing the craft. The cost of Pine is very low and comes in around £10 for a sheet around a meter in length and 0.2m wide.
Types of Hardwood
Ash
Ash is becoming tougher to come across unless you find wood merchants in your area. It’s a hardwood, coming in at four on the hardness scale, and has a straight grain throughout. It’s a pale brown coloured wood and takes a stain very well. Despite its hardness, Ash is actually pretty easy to work with, making a good option for beginners that want some hands-on experience with harder woods. You can pick up a 200mmx2000mm sheet of Ash for around £28.
Birch
Birch can be found in two colours – yellow and white. Birch is very readily available in comparison to Ash and is also much cheaper. Birch is fairly easy to work with, but it doesn’t stain very well, so reserve this wood for use on projects that will be painted. A 200mmx2000mm sheet of Birch will cost around £20.
Cherry
Cherry is an extremely popular option for woodworkers as it’s easy to work with, ages fantastically and stains very well. It’s one of the softer hardwoods, marked at 2 in the scale, and has a reddish-brown colouring to it. Cherry is in high demand so you’ll likely need to travel to a lumber merchant to secure, and you may even have to pre-order it. Due to this demand, it’s also fairly expensive, with a 200mmx2000mm sheet costing around £35.
Mahogany
A wonderful furniture wood, Mahogany has a deep brown colour to it, a straight grain throughout and marks a two on the hardness scale. Mahogany is famed for how well it stains, and it also ages brilliantly. The problem is that Mahogany is extremely hard to find and expensive when you finally do, costing upwards of £100 for a 200mmx2000mm sheet.
How to Prepare Wood
Following on from the guide on wood, it’s just as important to prepare the wood for your project. When you buy wood from a timber merchant, it’s not always kept in the optimal place. If there is still too moisture in the wood, you may come across problems during the construction of your woodworking project. The process of drying your materials isn’t expensive or difficult, but it is very important. We’ve broken it down into a few easy steps here:
- Buy a moisture meter to detect just how much moisture is in your materials and how long you’ll need to dry it out for. These tools aren’t expensive or confusing, and they will be worth their weight in gold over your woodworking career. An acceptable score is 7% or lower. If it’s any higher, you’ll need to dry the wood out.
- To dry out the wood, lay out some stickers. Stickers are just old pieces of wood that are lay on the floor laterally with one another for your wood to be placed on, allowing airflow under the wood to dry it fully.
- Lay your wood on top of the stickers about an inch apart to allow for the correct airflow. Repeat until all of your wood is out to dry.
- Keep the wood in a well ventilated, dry and covered place to allow them to dry out as quickly as possible and keep checking that they are drying out with your meter.
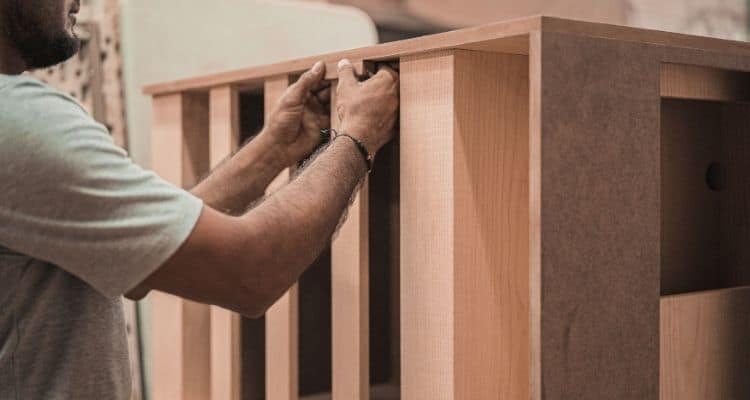
Woodwork Projects for Beginners

We’re going to give you some inspiration for your first woodworking pieces. These projects will allow you to practice the basic woodworking techniques that you’ll need to master before moving on to more advanced projects that will list later in this article. All the projects listed have free plans and specific instruction guides all over the internet, so they’re easy to find!
- Floating Shelves – These shelves attach directly to the wall and appear to be floating as there are no visible supports underneath. This will test your measuring, cutting and drilling accuracy!
- Tree Swing – There’s nothing better than making something that your children can play with. A tree swing is a classic project that gives you a chance to get as creative as you think you can!
- Wooden Tic Tac Toe Game – If done right, these types of games make lovely decorations, provide loads of fun and give you the chance to try some finishing techniques.
- Breakfast Tray – Treat your significant other with breakfast in bed sat atop one of your very own creations. A simple table with retracting legs may sound like an easy project, but it may provide a few aspects that make you think a little harder.
- Wine Rack – Jazz up the kitchen with your very own wine rack. This is a good way to practice building things that will require stability, as those glass bottles weigh quite a lot when they’re stacked up!
- Bedside Organiser – With space for a notepad, your mobile phone, watch, lamp and anything else you’d like a space for, a wooden bedside organiser is handy and fun to make!
- Lumber Rack – What better project can you take on than one that provides you with more woodworking equipment! A lumber rack keeps everything organised, accounted for and tidy.
- Pet Bed – Give man’s best friend his or her own bed. The best part about this project is that they won’t be able to comment on the tightness of your comb joints!
- Bath Caddy – Combine the best of the breakfast table with the bedside organiser and you have yourself a bath caddy!
- Bike Stand – Perfect for keeping your bike locked in place while you pump up the tyres or fiddle with the breaks.
Advanced Woodwork Projects
If the beginner's woodworking projects were too easy for you, try these on for size. Again, you can find step by step guides and material advice for each of these projects online!
- Garden Furniture – Whether it’s a lounger, a table or a full set, garden furniture is a great advanced project to have a crack at. You’ll need to look back at the wood guides earlier on this article to make sure you pick the right material, but this is a great project to take on as you begin to become more skilled.
- Chess Board – A luxurious chess board is a fantastic addition to any living room, and they’re trickier to build than you may think. The intricacies of the pieces and the accuracy of the board are extremely important.
- Workbench – Instead of buying an upgrade to your workbench, build one instead!
- Boxes – They look simple and easy, but make one slight mistake in your cutting or measuring and your box is done for. Building the perfect box is a great way to show yourself that you’re improving and that you have the basics nailed.
- Indoor Tables – It’s one thing to have your furniture outside and out of mind, but if it’s going to be the family dining table, it had better be up to scratch! Practice your decorations, finishing and accurate measurements with this one.
- Sweets Dispenser – Not only is this a test of your woodworking, but of working out how to build mechanics in with your pieces. You’ll need that skill more than you may think!
- Wooden Ornament – Practice your intricate carving and finishing skills by trying to build a wooden ornament. Pick something easy to start and then try some harder pieces.
- Ladder – Try building a small stepladder for around the house to make reaching the top of the cupboards a little easier. Be careful though, you’ll have to ensure it’s completely safe to use!
- Tool Organiser – Keep your workshop tidy and clean with a tool organiser that you can hang your equipment from. Again, due to the weight, it will have to be a sturdy build!
- Folding Chair – Play around with the challenges of measuring and building chairs that can be folded down flat. This isn’t an easy project to attempt, so make sure you’re skilled in the basics first!
Woodwork Training
There are a few ways to seek some more formal help in improving your woodworking skills. Local colleges and workshops will actually run courses that can last anywhere from a few weeks to months in order to help teach people about woodworking. These courses are great because it allows you to get hands-on with tools and projects whilst having an expert on hand for advice and guidance. The courses tend to follow the same pattern in which you will learn about the tools, equipment, safety and techniques for woodworking, and you usually pick up these skills by working on a project. You’ll have to pay for these courses, and they vary greatly depending on who is providing them, but you can keep an eye out on discount websites for special offers.
Conclusion

Woodworking is a worthwhile and entertaining hobby, made only more attractive by the fact that anybody with even a passing interest can get involved. Courses make it easier to learn from professionals in a controlled environment, while the ability to rent workshops and spaces make completing personal projects much easier. This article has provided a guide to the woodworking beginner, to put them on the best footing before propelling off and honing the craft of woodwork.
Sources
https://www.popularmechanics.com/home/how-to-plans/how-to/g2835/woodworking-projects/
https://www.pinterest.co.uk/pin/841328774116676012/
https://woodworkingtoolkit.com/woodworking-projects-beginners/
https://www.wikihow.com/Dry-Wood-for-Woodworking
https://www.woodmagazine.com/woodworking-how-to/wood-preparation
https://www.dummies.com/crafts/types-of-wood-for-woodworking/
https://advancedct.com/tips-for-working-with-tools-and-equipment/
https://vividlearningsystems.com/blog/30-tips-for-hand-and-power-tool-safety


