Damp Proofing Cost
Last updated 12th September, 2025
Does your home need a damp proofing?
This essental guide looks at how much different types of damp treatment cost in 2025.
Included are prices for damp proof courses, damp proof injections, external wall damp proofing membranes. It's also packed full of things you need to know if you have a damp problem in your home.
Let's get started!
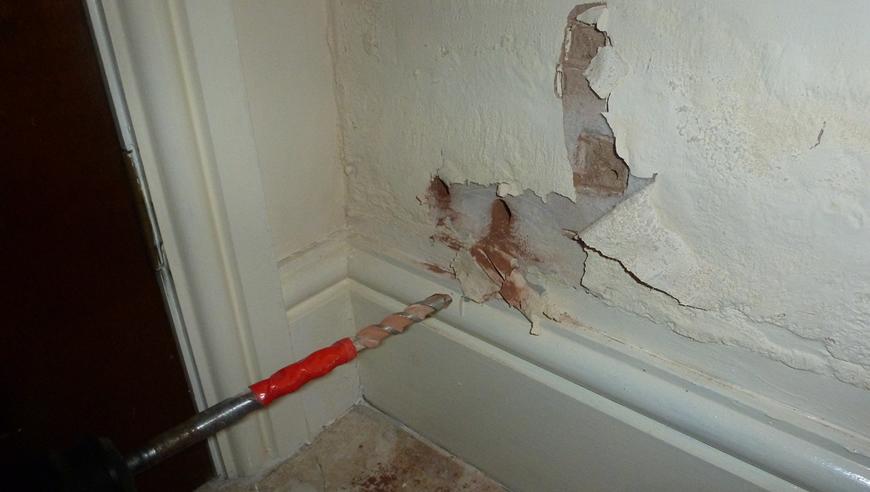
Table of Contents
- How much is damp proofing?
- Damp proofing prices
- Additional costs of damp proofing
- Labour cost to damp proof a house
- What does damp proofing house walls involve?
- Factors that impact damp proofing costs
- What causes damp in a home?
- Symptoms of damp
- How to fix damp
- What happens if you leave damp untreated?
- Preventing damp
- How to damp proof basements
- Reasons for damp proofing your walls
- FAQs
- How to find and hire a damp proofer
- Sources
How Much is Damp Proofing?
Damp proofing is a general term that covers all methods and treatments used to prevent damp being absorbed through walls or floors into the interior of a property. Damp and rot can eventually cause structural damage to a property, so it is essential to identify and tackle damp as soon as possible to help prevent any further damage.
If there is no existing damp proofing or the physical barrier is damaged, it can lead to problems including rising damp, dry and wet rot.
When a property is constructed a preventative damp proof course (DPC) is normally built into the walls, just above ground level.
Although if you're concerned about damp issues, you may still wish to arrange for an independent damp survey to be carried out.
If you hire a professional in to do damp proof your home it will normally include:
- A full inspection of walls (visual plus damp meter)
- Checking the existing damp course
- The removal of skirting boards and plaster internally 1.5m high
- The injection of waterproof liquid
- Then Waterproof render applied to the internal wall and then finish the job off with plaster
The average cost of a damp proof course is around £280 to £2,000 depending on the size of your home and the extent of the damage. To damp proof an entire 3 bedroom semi-detached house, will cost around £4,200. This price will include labour costs, a new DPC inserted into both internal and external walls, plus the rendering and plastering of all internal walls to finish the job.
Other common damp proofing work includes building a drainage channel around one side of the building so rainwater is channelled away from the walls and cannot compromise the existing DPC. The drainage channel is usually filled with stones and connected to the existing soakaway and rainwater downpipe. Drainage channel quotes are typically in the region of around £1,000.
Other methods you could include damp proof paint, which is usually painted onto the substrate and then covered with plaster. The damp proof paint can also be applied to the plaster to lock in the moisture and avoid damp forming and spreading. This is usually a DIY damp proofing job and costs around £6 per litre.
To damp proof concrete, brick and masonry walls, you may want to try applying a tanking slurry, which is a waterproof coating made up of cement which acts a damp proof barrier. Typically, tanking slurries are used in basements; they work equally as well above ground and cost around £30 to £40 per square metre for professional application.
Another popular option is to re-plaster your interior walls using a waterproof-based plaster which will cost in the region of £300 per room. For your exterior walls, you will need them to be re-rendered which is usually priced at £40 to £60 per square metre to apply a new layer of render which includes primer and trims.
If you are getting this work done, then it makes sense to check the condition of the interior plaster and redecoration. You may need the entire walls plastered, so this would be a good time to re-decorate and paint walls and skirting boards.
Damp proofing is a messy job due to the plaster and skirting boards needing to be removed, so it's best to move out for a couple of days if you can, otherwise try and seal off the area where the plaster is being removed as best as you can. It’s always best to get the damp proofing work done quickly and to tackle any damp issue as soon as possible as damp can spread quickly rotting timber floor joists and skirting boards.
Although the plaster only needs to be removed up to around 1.5 metres from the floor, if the plaster is old and in particularly poor condition, it will probably all need to be removed and re-plastered. Same goes for skirting boards; if they are damp and rotten, they may crumble when being removed so will need to be replaced. Also, once the job is done, there will still be painting walls or wallpapering required to finish the work, which will not be included in any quotes you get when pricing the job.
Damp Proofing Prices
Here are a few average damp proofing costs for hiring a professional to damp proof your entire home:
| HOME TYPE | DAMP COURSE | TANKING SLURRY | RE-PLASTER | RE-RENDER |
|---|---|---|---|---|
| Terraced (82 m²) | £280 - £370 | £2,450 - £3,500 | £1,200 - £1,800 | £2,000 - £5,750 |
| Semi (93 m²) | £500 - £800 | £2,800 - £3,800 | £1,800 - £2,400 | £2,250 - £6,500 |
| Detached (152 m²) | £1,500 - £2,000 | £4,560 - £6,000 | £2,400 - £3,000 | £3,800 - £12,000 |
Below are the damp proof costs associated with different size homes with or without a drainage channel:
| House Type | Drainage Channel | Avg. Cost | Duration |
|---|---|---|---|
| Terraced | No | £2,000 | 2-3 days |
| Terraced | Yes | £2,500 | 3-4 days |
| Semi-detached | No | £2,500 | 3-4 days |
| Semi-detached | Yes | £3,000 | 4-5 days |
| Detached | No | £3,000 | 4-6 days |
| Detached | Yes | £3,500 | 6-8 days |
Here are the costs associated with the different types of damp and the price of each treatment:
| Types of Damp | Damp Treatment | Average Cost |
|---|---|---|
| Condensation | Install a damp proof course | £280 - £2,000 |
| Penetrating damp | Applying damp proof paint to walls | £370 - £500 per room |
| Rising damp | Damp proof walls with tanking slurry | £2,000 - £6,000 |
Additional Costs of Damp Proofing
There are some additional costs that you may also want to factor into your budget. For instance, in areas like your bathroom, you may want to invest in an extractor fan which cost around £200 to install. You could also opt for a dehumidifier to reduce condensation, prevent mould and warm up your home for just £90.
To prevent further damp caused by a leaking roof, you will need to have it repaired. The rate will depend on the cost of the materials, as costs start from £50 per m² for a felt roof, £80 per m² for a rubber roof, and even up to £90 per m² for a fibreglass roof.
In the event you need to have your entire roof replaced, this will cost on average around £4,500. Although it’s worth considering other factors such as the size and design of your roof, along with the type of materials you wish to use. For example, the average cost of a tile roof in the UK is £6,800, slate £7,500, asphalt £5,950 and choosing a metal roof can increase the cost to around £8,300.
You could also damp proof your roof further by having your gutters replaced which can cost up anywhere from £480 to £720. In the event you need to have your entire roof replaced, this will come at an additional price.
You may also want to update your windows and doors by having them resealed, which costs around £55 per window and £85 per door. You could even opt for brand new doors including both internal (£50 to £200) and external (£300 to £1,600). For new windows, you can expect to pay up to £300 per window for double-glazing.
Damp Proofing Cost Breakdown Calculator
Individual costs for hiring a specialist company to damp proof the walls of an entire 2-bedroom terraced home:
Total Cost: £4,200
Damp Proofing
£840
Tradesmen
£1,260
Plastering & Rendering
£2,100
Labour Cost to Damp Proof a House
Most damp proof specialists don't charge by the day, more so by the size of the job. The time it takes to complete the job, it again depends upon the size of the property. The actual damp proof course itself won't take more than a few hours but the plastering and rendering to make the job look tidy again afterwards could take a couple of days.
The average labour cost for damp proofing is around £100 to £200 a day to fix damp issues. The time spent on the job will depend on the treatment as well as the size of your home. For example, if you live in a terrace home that requires a new damp proof course, then this could take around 1 to days, while a 3-bedroom semi-detached home could take up to 4 days to complete.
If using tanking slurry to repair damp in your home, this can take at least 2 days to complete, as it has a drying time of up to 24 hours before another coat can be applied. While applying damp proof paint will take around 6-12 hours per room.
If re-rendering your home to prevent damp, this can take around 4 to 6 days for a small terraced house, 5 to 8 days for a 3-bedroom semi-detached home and 1 to 2 weeks for a 4-bedroom detached home. While plastering the interior walls should only take up to a day to finish each room.
For rising damp treatment, a damp proof course is needed which will cost around £280 to £400 for a typical terraced home. This is usually installed in your front interior walls and should take around 2 days to complete. This will involve removing everything from the area, including flooring, wallpaper/paint, plaster, skirts, sockets, radiators. Waterproof render and plaster will then be applied, and new skirts, rad and sockets will be replaced.
What Does Damp Proofing House Walls Involve?
There a few ways to damp proof walls within a property. Here are what the different methods entail:
Damp Proof Course
The following steps will be carried out to install a new damp proof course:
- The first step is to drill holes into the wall measuring 12mm in diametres at intervals of 115mm while making sure that it's at least 150mm above, outside or level to the ground.
- The next stage is to inject the DPC outwards starting from the bottom of the hole until it is full.
- The holes will then be filled with a plastic plug or capped with mortar to prevent any leakage.
Tanking Slurry
Professional tanking involves the following steps:
- Plaster, debris, paint and any other materials should be removed from all wall surfaces and then cleaned thoroughly to prepare for the job.
- A salt neutraliser will then be applied to the wall surface to prevent existing salts from affecting the new tanking.
- While the wall is slightly damp, holes should be filled with mortar, cement, sand and a waterproofer.
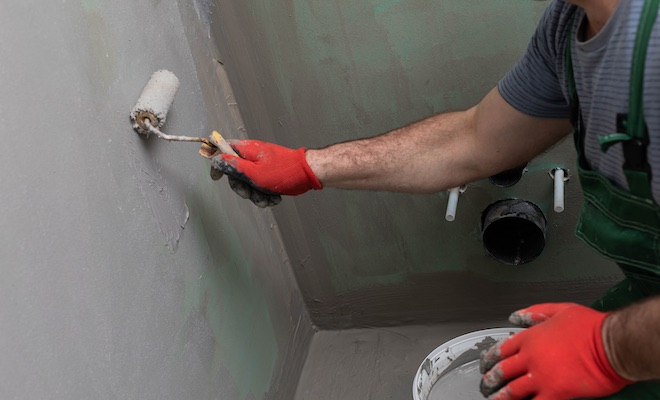
- The wall should then be dampened again before applying the tanking slurry with a soft paste brush making sure it is applied horizontally.
- The tanking slurry should then be left to dry for 24 hours, and then another coat can be applied.
Re-Rendering
Re-rendering the walls involves the below processes:
- Before any rendering walls can begin, the building will be surveyed to check for any structural issues which should be fixed, and any other fixtures such as pipes may have to be removed before a render system is put in place.
- Metal stops and angle beads will be placed around windows and door openings to create clean edges for the render to be applied.
- External insulation may be updated at this point; however, this is not always required.
- Render is then applied, followed by a fabric render mesh which should be embedded in the first render layer to prevent cracking.
- This is then followed by a primer and a topcoat which can come in a variety of finishes which may not require additional paint.
Re-Plastering
If interior walls need to be re-plastered, this will involve these steps:
- To prevent mess and protect your floors, a dustsheet will be placed down to collect dust and debris.
- Once the walls are clean, PVA will be applied to the wall, which will make sure the plaster dries out evenly.
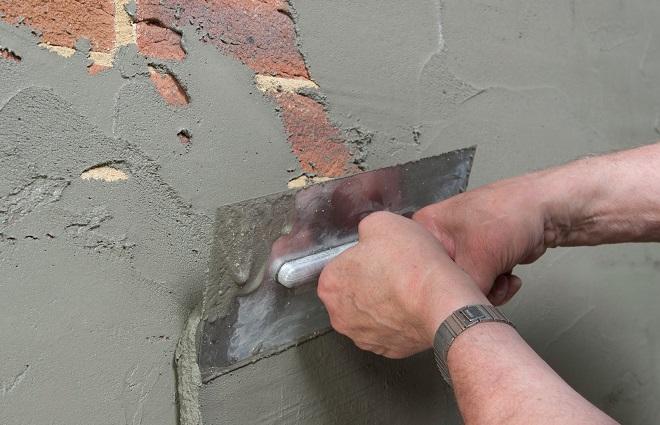
- When the glue is sticky, the plaster will then be mixed and applied using a hawk board, trowel and float, making sure the plaster is spread upwards.
- Once the first coat is complete, it should be left for 20 minutes before skimming and smoothing it, making sure there are no bumps.
- The second coat can then be applied, although this will be much thinner than the first.
- To finish off the job, water will be applied to the surface to smooth out any bumps and painting any small corners; then once dry sanding paper can be used to remove any excess plaster.
Damp Proof Paint
To damp proof your home using damp proof paint, a professional will do the following:
- Any damp plaster attached to the brick will be removed, and any loose fixtures should be secured.
- The wall will then be cleaned, making sure to remove paint, as well as any dirt or grease.
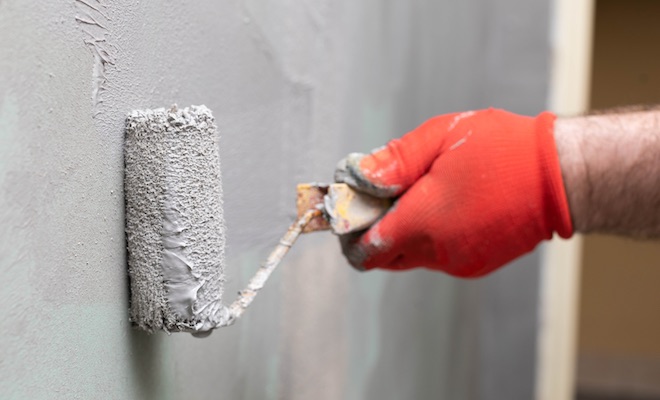
- The first coat of damp proof paint is then applied using a brush or spray.
- While the paint is wet, dried kiln sand will be used to smooth out the surface.
- The second layer of paint will then be added and then re-plastered once it is dry.
Factors That Impact Damp Proofing Costs
Various factors affect the cost of damp proofing, such as the location of the damp and the treatment. For example, on the lower end is the cost to fix condensation, which is the process that occurs when warm air comes into contact with a cold surface forcing it to release water and creating condensation. To fix minor condensation issues, you should expect to pay around £16.50 for a condensation control vent which will act as a preventative method against damp. However, you could pay up to £200 if you have severe condensation issues, which will involve the installation of a ventilator or around £280 for a new damp-roof course to be applied to each wall.
One of the most common damp issues is penetrating damp which is usually caused by water seeping through the building through leaking pipes, blocked gutters, or even loose roof tiles. The damp can start to come through the paintwork in patches, which can ruin the plaster, insulation and structure of your walls. To repair this, you may need to install a new damp proof course costing around £280 to £2,000, which usually includes removal of the paint and plaster, the installation of the DPC and then re-plastering and re-rendering, although these can also be added costs, depending on the tradesman you choose.
Another effective method for rising damp is applying tanking slurry to the inside of affected walls, which on average is priced at £30 to £40 per m². This includes the cost of all materials, as well as the removal of plaster, debris and paint. Re-decorating costs may also be included, although they are usually added on at around £375 to £500 per room.
You may also want to consider installing a new drainage channel to reduce damp build-up. This will cost an additional £2,500 for a terraced home, £3,000 for a semi-detached home and £3,500 for a detached home.
What Causes Damp in a Home?
There are numerous reasons why damp occurs in the home, although the most common causes include condensation and increased air moisture which is formed when using the dryer or drying clothes inside. Some of the most common areas that are affected by damp include the kitchen and bathroom, as these rooms generate a significant amount of air moisture when cooking or showering.
Damp can also form as a result of damage to your roof, pipes and guttering which can cause leaks, mould and rot. Damaged rendering can also cause penetrating damp, even if there are just small cracks in the wall, as the moisture will eventually reach the brickwork resulting in the development of damp.
Another external cause of damp is through your windows, and doors, which may not be sealed properly, resulting in water getting into your property. You may also want to check your cavity wall insulation, as this can be prone to damp, especially if it is not maintained.
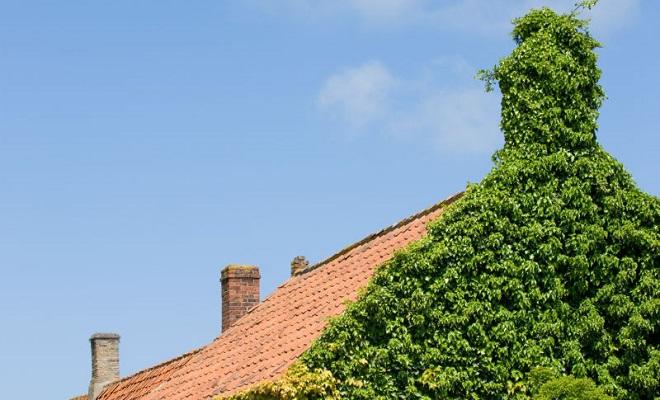
Even spillages can cause damp when left, as any liquids that are left may cause walls or skirting boards to rot. The same can be said for vegetation which may form in your roof and work its way into the brickwork and cause damp in your house.
Symptoms of Damp
If you're worried you may have damp, check for the following symptoms:
Condensation
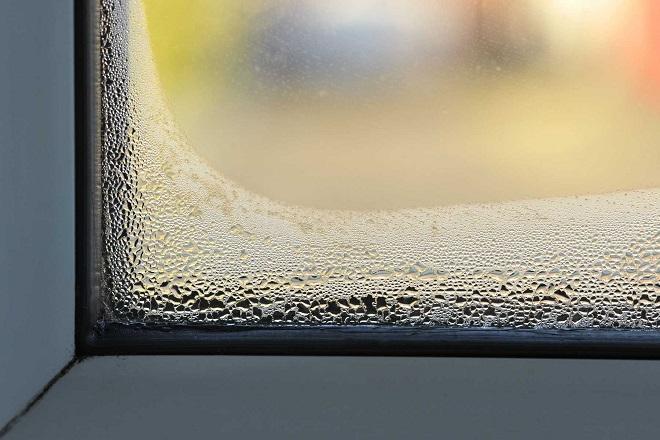
Condensation forms when warm air comes into contact with water on a cold surface causing it to steam up. While condensation is a regular occurrence, a significant amount of condensation can cause damage from damp.
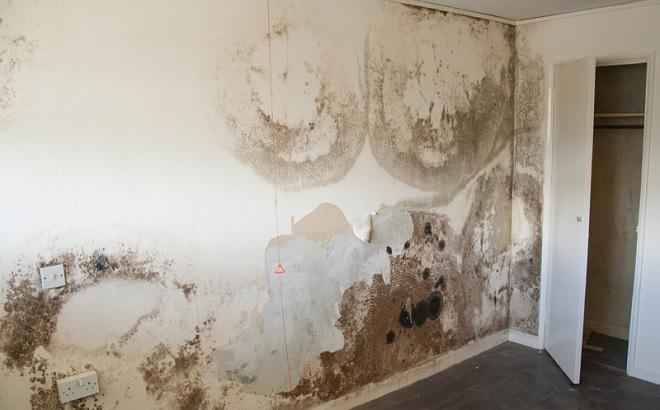
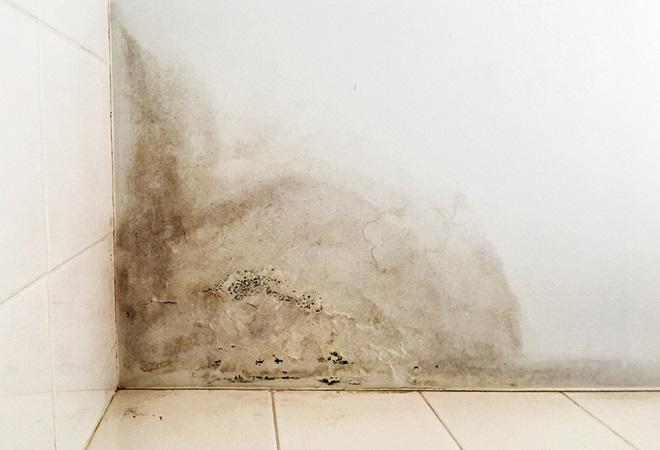
The main symptoms of condensation damp can be found on your walls which may feel cold and could also feature black dots on your paint or wallpaper, which is the start of mould growth.
The most common areas for condensation to form include wall, ceilings, windows, curtains, furniture and even the attic where you could find black mould forming. You may also notice a musty smell, especially in your loft as it is usually much colder in this area of the house.
Penetrating damp
Penetrating damp is caused by water entering the property through external walls, which is usually the result of a structural defect. The most common areas affected by penetrating damp are south-west facing walls which are exposed to heavy rain.
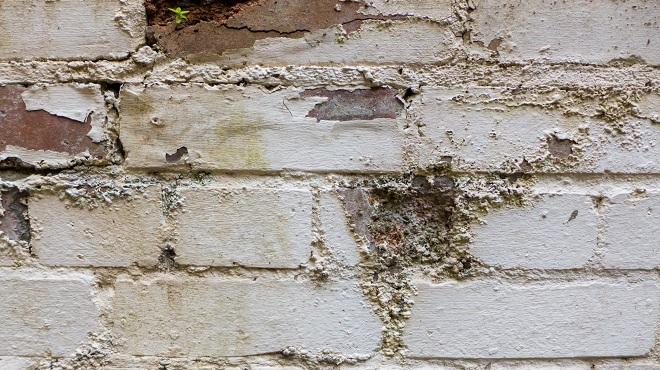
The most common signs of penetrating damp include the appearance of damp stains on exterior walls and patches on the ceiling and interior walls. You may also notice that your plaster is wet or crumbling as well any black mould that may have formed in an isolated area.
More serious cases may involve dripping water from the ceiling or puddles of water found near internal and external walls.
Rising damp
Rising damp is one of the most severe forms of damp which occurs as a result of water entering from the ground into the walls in a vertical motion. This usually forms in the exterior brick walls, although it can be visible inside a property.
Signs of rising damp include damp patches that appear at the bottom of a wall and move upwards. You may also notice damp or rotting on skirting boards or wall plaster, and your wallpaper or paint may start to peel.
In more severe cases, a white salt-like substance may start to form on your wall as well as any yellow or brown stains. Your flooring may also be affected if you notice your tiles, vinyl or carpet lifting and it feels wet to touch.
How to Fix Damp
Damp proof can be a complex job, especially if you have no experience in construction, so in some cases, it may be best to leave it to the professionals, as this will avoid any structural issues or even building regulation problems.
However, if you do feel confident about damp proofing walls, then there many ways to do this on a DIY basis, although there are various methods for different types of damp, including:
Condensation Damp Treatment Cost
Condensation is one of the most common types of damp which can easily be remedied by applying damp proof paint to your walls. This can be painted on like any other type of emulsion, although it may take longer to apply an even coat. To complete the job, you would need to purchase the right tools, such as brushes which cost around £4 to £17 for a set, a roller for around £3 to £15, and sandpaper at £9 to £15 a roll.
A dehumidifier is a great solution for combatting condensation as it sucks in air and removes the moisture. The typical cost for a decent dehumidifier is around £90. However, you may be hit with energy bills if you run it too often as it uses up a significant amount of electricity.
You should also consider updating your ventilation, especially in a bathroom with no windows.
Condensation is one of the most common types of damp which can easily be remedied by applying damp proof paint to your walls. This can be painted on like any other type of emulsion, although it may take longer to apply an even coat. To complete the job, you would need to purchase the right tools, such as brushes which cost around £4 to £17 for a set, a roller for around £3 to £15, and sandpaper at £9 to £15 a roll.
Another great damp proofing solution is applying damp proof paint to your walls. While it is not technically a damp proof treatment, it can act as a preventative method and is also great at covering up mould. It is also very easy to maintain and only costs around £6 per litre. The only downside is that if there is already damp in place, it does not remove the damp.
Penetrating Damp Treatment Cost
One of the easiest ways to stop penetrating damp is by repairing or unblocking your gutters and downpipes. This will help eliminate any vegetation and will also prevent leaks from occurring. Gutter repairs can cost be costly with prices ranging from £35 per metre for uPVC gutters and up to £75 per metre for cast-iron guttering.
If you have penetrating damp in your home, you can easily fix this by sealing your windows. This will require expanding spray foam, which costs around £5 to £13, a pry bar for £4 to £10, a hammer which will cost around £3 to £28 and utility knife for £3 to £13. You will need the pry bar and hammer to remove either the inside or outside trims on each window. The space where the trims were should then be filled with expanding spray foam. You should then avoid touching the foam for a few hours until It is completely dry, then you can cut off the excess material with a knife. You can then re-apply the trim in reverse order and touch up any paint if need be.
For more severe cases, you may want to opt for tanking slurry installation, which is a waterproofing coating made up of cement and water repellent chemicals. The great thing about tanking slurry is that it stops water in its track which prevents mould and rot, while also protecting the new decoration in your home. The cost to install tank slurry to your walls is around £30 to £40 per square metre, which can add up in a larger room.
You should be careful when combining tanking slurry with concrete, as it may cause the surface material to lift. Instead, you should opt for a tanking membrane which is plastic sheeting with implanted studs. The starting price for this is about £75 per roll. The cost will vary on the extent of the damp issue, size of the room and quality of the material.
Rising Damp Treatment Cost
Rising damp is one of the more complex damp problems which always used to require the help of a professional. However, now there is the option to buy a DIY damp proofing kit to replace your damp proof membrane and fix rising damp. The typical cost for a kit is around £100, which includes damp proof cream, a damp proof cream gun, and drill bits which will be used for a damp proof injection.
A great way to combat rising damp is by re-rendering and re-plastering with water-resistant materials, as will extract the damp and remove any mould that has started to grow on the walls. The typical cost to re-render your exterior walls will range from £25 to £70 per square metre, while re-plastering is usually priced at £300 per room. However, costs could increase depending on the thickness of your walls. You should also consider the cost of moving or relocating external or internal fixtures such as furniture, alarm boxes, air vents and more.
Typically, a DIY damp proof course involves the use of water-repelling chemicals in the form of damp proof cream which can be injected into the walls and cost around £100 per kit. Other alternatives include a pore-blocking salt mixture which is a cement-based product that should be installed using a machine pump and will most likely require a professional’s help who will charge around £100-£150 per day. Another option could be using an electric osmotic water repellent which involves the installation of wires that are embedded into the wall to repel water infiltration in an active or passive motion. While this is effective, the process is complicated and costly, with just the equipment priced at around £300.
What Happens If You Leave Damp Untreated?
If you fail to treat damp, this could later cause structural problems which can be extremely costly. This is especially true if you leave rising damp untreated, as this can damage wall materials including plaster, wallpaper, plaster and can even cause internal timber to rot.
Untreated damp can also lead to mould growth which can spread to other areas of your home. This could result in massive costs, which could include a new damp proof course which will cost around £280 to £2000, wall insulation at £200 per wall, rendering at £25 to £70 per square metre, plastering at £300 per room, and painting which costs around £370 to £500 per room.
Leaving damp untreated can also be dangerous, especially if you suffer from any respiratory issues such as asthma, as inhaling mould fragments can cause blockages.
Preventing Damp
There are plenty of ways you can prevent damp before more serious damage occurs. The most common way to stop damp forming is to ensure your home is properly ventilated, especially in rooms like the bathroom and kitchen. The most obvious form of ventilation is windows, which should be opened when showering or using the bath to prevent a build-up of condensation. To ensure your windows and doors are providing effective ventilation, you should check that they are sealed properly to avoid damp getting in when they are closed.
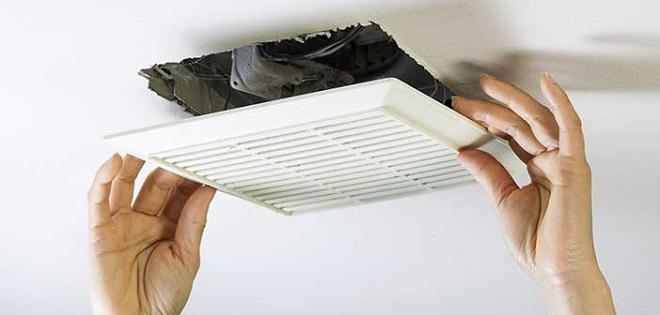
If you do not have windows in your bathroom, you should consider having another form of ventilation installed such as an extractor fan which can be placed on the ceiling or the wall. You may also want to install one above your oven in the kitchen to prevent it from steaming up.
You should also try to actively reduce the amount of moisture in your home by shutting bathroom and kitchen doors while showering or cooking. You could also place a dehumidifier in rooms that produce a significant amount of condensation.
Maintaining the exterior of your property is also a good way to prevent damp, which could include cleaning your guttering, removing vegetation from your roof, while also checking for any loose roof tiles and getting them replaced as soon as possible. You should also avoid placing large plants right next to the exterior of your property, as this can cause vegetation to grow on the brick walls.
How to Damp Proof Basements
One area that is prone to damp is your basement, as it is the closest room to the ground. Therefore, it is susceptible to leaks from groundwater which runs through concrete foundations and enters exterior and interior walls. Severe cases tend to show apparent leaks; however, sometimes the water can evaporate and increase in indoor humidity which leads to condensation, especially in warmer months.
To fix damp in your basement, you could consider installing tanking, which usually costs around £30 to £40 per square metre, although this will depend on the type of tanking material you use.
Tanking slurry is a cement-based damp proofing liquid that is bonded with damp masonry to forms a waterproof coating. This works to stop mould and water from entering cavity walls. While tanking slurry offers a significant amount of waterproofing protection, you should be careful when applying it to a concrete floor as it has no key for the tanking to attach to, which will result in the wall surface lifting.
Tanking membrane is made up of a studded plastic sheeting which is installed using plugs and sealed with tape. The studs in the membrane enable air to circulate at the back of the membrane, any excess moisture is infiltrated with a drainage channel into a sump pump. If you have a significant amount of damp, then you should try to choose a damp proof membrane which has larger studs, as the more damage there is, the bigger studs you will need. You can expect to pay anywhere between £75 to £280 per roll. When installing membrane, you need to make sure that any timber is removed as the membrane will not protect this material and may result in rot and damp forming.
Reasons for Damp Proofing Your Walls
There are several reasons for having your walls damp proofed, the first being to avoid damp and rot spreading which, will affect your home’s structure. This will also prevent any additional costs which may arise as a result of damp.
By damp proofing your home, you can also improve your return on investment, as it means buyers will not have to pay out to damp proof walls when they move in. This will also make the selling process much easier, as an agent will be able to sell it quickly.
Damp proofing can also prevent any arising health issues, especially for anyone with asthma who may be struggling to breathe due to mould debris.
FAQs
There are various commercial high-pressure systems available to insert the chemical into the wall, but some use a drip-feed system that slowly introduces the waterproof liquid over 48 hours. The newer systems on the market use creams that are squeezed into the holes rather than a liquid.
To prevent penetrating damp, make sure check the guttering is clear of any blockages, ensure there are no cracks in the walls or window frames or loose roof slates. Condensation can be prevented by adequate ventilation and heating, plus using extractor fans in rooms such as the kitchen and bathroom where there is a lot of water/humidity. Damp caused by rising damp can be identified as the damp patches rise from floor level up to a typical height of around one metre. Damp patches higher than this will likely be condensation or penetrating damp.
For more extensive damp issues, you may want to install a damp proof course which will involve removing paint and plaster and then injecting the waterproof material inside the walls. Tanking slurry is another option, which is especially effective in basements, where again it can be inserted inside both interior and exterior walls.
You should also try to check your walls as often as you can to see if they are damp, as this will help you to prevent more expensive damp issues. You should also take a look at your doors and windows and look out for any rot which could be a sign of damp forming.
How to Find and Hire a Damp Proofer
The average cost of hiring a damp proofer is around £100 to £200 per day, although this will, of course, depends on the extent of the job, the location as well as the tradesman’s experience.
If you spot any signs of damp, then the best thing to do is to have your home inspected by an independent surveyor or a trustworthy damp proofing specialist to perform a damp proof survey. Be careful hiring an unknown damp proofing company to inspect your damp walls as they may try to sell you a damp proof course that is not required. The damp proofing industry has a bad reputation in the UK selling unnecessary wall treatments when the real cause of the damp is often just the existing DPC being bridged.
You should also check to see if the damp proofing contractor you choose has public liability insurance as this will act as a form of financial protection should an accident occur when getting rid of damp.
Sources
https://energysavingtrust.org.uk/dealing-damp-home/
https://theconversation.com/health-check-how-does-household-mould-affect-your-health-48341
https://www.restorationuk.com/how-to-tank-damp-walls-tanking-and-waterproofing-to-treat-penetrating-damp/
https://www.neverpaintagain.co.uk/blog/repairs-after-wall-tie-replacement/
https://www.dummies.com/article/home-auto-hobbies/home-improvement-appliances/general-home-improvement-appliances/how-to-seal-windows-184056/


