House Cladding Cost
Last updated 4th June, 2025
Have you been considering house cladding?
This uPVC cladding price guide breaks down all the associated costs with having plastic cladding fitted to your house. We discuss the materials costs, labour fees and timeframes involved with this type of work plus much more!
Let's get started below!
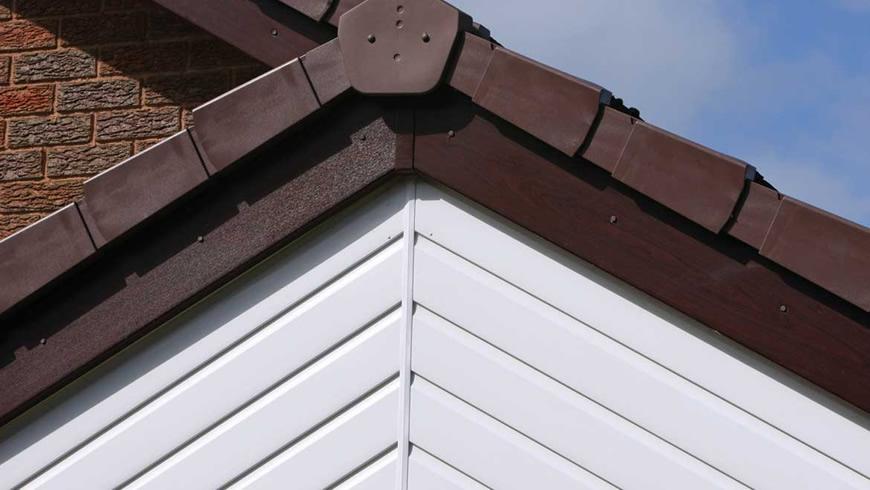
Table of Contents
- How much does fitting uPVC wall cladding cost?
- Labour costs and time frames
- Additional costs
- What is uPVC wall cladding?
- Cost affecting factors of fitting uPVC wall cladding
- What does fitting uPVC wall cladding entail?
- Choosing upvc wall cladding
- Alternatives to uPVC wall cladding
- Summary for Type of Wall Cladding
- Benefits of uPVC wall cladding
- DIY fitting uPVC wall cladding
- DIY Wall Cladding vs Professional Wall Cladding
- Cost of removing uPVC wall cladding
- FAQs
- How to find & hire a uPVC wall cladding fitter
How Much Does Fitting uPVC Wall Cladding Cost?
The cost of your uPVC cladding will depend on a number of factors; the size of the cladded area, whether you need scaffolding to install it and the type of cladding you choose as well as the finish.
The two main types of uPVC cladding are shiplap and V-joint.
Shiplap normally comes as 150mm wide boards at 5 metre lengths. White shiplap costs on average £25-£35 per square metre while coloured versions are more expensive at around £40-£45 per square metre.
V-joint uPVC cladding boards are 100mm wide and again come in 5 metre lengths. White V-joint cladding costs on average £30-£40 per square metre and the coloured variations cost approximately £50-£60 per square metre.
The size of the area that you wish to clad will determine the amount of cladding that you will need.
Some people install cladding as an aesthetic feature just on the gable or the top half of a front elevation while others wish to cover and protect the whole property. As houses vary in size and dimensions, this will differ from one project to another.
If you intend to do the work yourself, then you will need scaffolding or a scaffold tower to safely install the cladding. The cost of scaffolding is between £130-£160 per day and to hire a scaffold tower for a day will cost around £250.
The ease of access to the work area for installing the cladding will have an effect on the overall cost. Awkward, narrow, or difficult areas to safely work in may require specialist scaffold erection or additional labour, which will increase costs.
The type of cladding that you choose for your home will affect the price that you pay. White uPVC cladding is the cheaper option with colours and woodgrain effects being more expensive.
If you currently have stained timber cladding boards and want a similar woodgrain type finish with uPVC, then there are a few options with uPVC woodgrain effects. However, there is a considerable difference in cost between white and wood effect uPVC cladding.
uPVC Wall Cladding Prices
The following table gives an idea of uPVC cladding cost per square metre and includes different types and colours as well as the cost of scaffolding and labour.
| COLOUR | SHIPLAP 150MM | V-JOINT 100MM | SCAFFOLDING | LABOUR COSTS |
|---|---|---|---|---|
| White | £25-£35 per sqm | £30-£40 per sqm | £130-£160 per day | £250-£300 per day |
| Anthracite | £40-£45 per sqm | £50-£60 per sqm | £130-£160 per day | £250-£300 per day |
| Black Ash | £40-£45 per sqm | £50-£60 per sqm | £130-£160 per day | £250-£300 per day |
| Golden Oak | £40-£45 per sqm | £50-£60 per sqm | £130-£160 per day | £250-£300 per day |
| Rosewood | £40-£45 per sqm | £50-£60 per sqm | £130-£160 per day | £250-£300 per day |
The following are an indication of the average cost of uPVC cladding for varying sized areas, including the cost of scaffolding and labour.
| COLOUR | 50m² SHIPLAP | 100m² SHIPLAP | 150m² SHIPLAP |
|---|---|---|---|
| White | £1650-£2200 | £3250-£4500 | £4500-£6000 |
| Anthracite | £2400-£2700 | £4750-£5500 | £6750-£7500 |
| Black Ash | £2400-£2700 | £4750-£5500 | £6750-£7500 |
| Golden Oak | £2400-£2700 | £4750-£5500 | £6750-£7500 |
| Rosewood | £2400-£2700 | £4750-£5500 | £6750-£7500 |
| COLOUR | 50m² V-JOINT | 100m² V-JOINT | 150m² V-JOINT |
|---|---|---|---|
| White | £1850-£2500 | £3750-£5000 | £5250-£7000 |
| Anthracite | £3000-£3500 | £5750-£7000 | £8250-£9950 |
| Black Ash | £3000-£3500 | £5750-£7000 | £8250-£9950 |
| Golden Oak | £3000-£3500 | £5750-£7000 | £8250-£9950 |
| Rosewood | £3000-£3500 | £5750-£7000 | £8250-£9950 |
Supply Costs
If you decide to install the cladding yourself, the below table gives an indication of the average uPVC cladding cost per 5 metre lengths for white and various colours.
150mm uPVC shiplap cladding covers 0.75 square metres, and 100mm uPVC V-joint cladding covers 0.5 square metres.
| PER 5 METRE LENGTHS | SHIPLAP 150MM | V-JOINT 100MM |
|---|---|---|
| White | £20-£25 | £15-£20 |
| Anthracite | £30-£35 | £25-£30 |
| Black Ash | £30-£35 | £25-£30 |
| Golden Oak | £30-£35 | £25-£30 |
| Rosewood | £30-£35 | £25-£30 |
Cladding Cost Breakdown Calculator
Individual costs to install 150mm white shiplap uPVC cladding boards to the gable end of a 2-storey house - Total Cost: £2000
Materials & Waste
£1100
Labour
£700
Scaffolding
£200
Additional Costs
The uPVC cladding cost may not be the only thing to consider, and there may be some additional costs that you need to think about when you fit cladding to the exterior of your home.
Before we look at each aspect in further detail, here's a top-level table to showcase some of the additional wall cladding costs:
| Additional Cost | Cost Range | Details |
|---|---|---|
| Scaffolding (DIY) | £130-£160 per day | Cost to hire scaffolding for DIY installation of uPVC cladding. |
| Scaffold Tower (DIY) | £250 per day | Cost to hire a scaffold tower for the day. |
| Insulation | Quoted separately | Additional cost for insulation to improve thermal properties. |
| New Fascia & Soffits (Painting) | £800 | Cost to repaint fascia and soffits for an average semi-detached house. |
| New Fascia & Soffits (Replacement) | £1500 | Cost to replace fascia and soffits for a semi-detached house. |
| Cap Fascia & Soffits | £750 | Cost to cap fascia and soffits for a semi-detached house. |
| New Guttering | £500 | Cost to install new guttering for a semi-detached house. |
| Gutter Cleaning | £125 | Cost to clean guttering for an average-sized semi-detached house. |
Scaffolding
Scaffolding or a scaffold tower will most likely be needed to install the uPVC cladding, and you may want to think about which is preferable for you if you intend to do the work yourself. Hiring scaffolding will cost between £130-£160 per day if you decide to install the uPVC cladding as a DIY project.
A scaffold tower will cost approximately £250 to hire for the day.
Some cladding installers will erect their own scaffold access towers, some will use a specialist scaffold company, but the cost of the scaffolding will be included in the overall price that you pay a professional uPVC cladding installation company.
Insulation
Quotes for uPVC cladding do not normally include any additional insulation or backing felt, so if you require extra insulation to improve the thermal properties of the external walls, then this would normally be quoted separately if required.
Installing insulation should be done with care as it is necessary to allow a gap for air circulation to ensure that there is no condensation problem following installation.
New Fascia & Soffits
Having new uPVC cladding is likely to highlight any other roofline features that may need repair, repainting or replacing. If they are made from timber, it will be possible to repaint your fascia and soffits, which will improve the appearance without the need to replace them.
The cost to paint the fascia and soffits for an average semi-detached house will cost in the region of £800. However, if they are made from uPVC, then you may need to replace them.
Replacing the fascia and soffits on your home will cost approximately £1500 for a semi-detached house with a hipped roof and good access.
As a less expensive option, you may wish to just cap your fascia and soffits, which simply means putting new on top of old without taking the existing out. The cost of this work will vary depending on the size of the property, but for a semi-detached house, the average price will be around £750.
Guttering
As with fascia and soffits, the installation of new uPVC cladding may show up your guttering if it is not in optimum condition. Fitting new guttering will cost around £500 for an average-sized semi-detached house.
Of course, your guttering may just need to be cleaned and the average cost to clean guttering is around £125.
Labour Costs and Time Frames
When budgeting for the cost of labour to fit uPVC cladding to your home, it will be necessary to consider the size of the area to be clad.
This will also have an impact on the amount of time that the work will take. For example, the entire exterior of a house will take a lot longer than a gable end or a porch and cost more.
Cost to Fit uPVC Cladding
A professional uPVC cladding installation company will include the cost of labour in the price quoted to you.
Normally there would be at least two people required to carry out the work, and the cost would be approximately £250-£300 per day for both.
How Long Does It Take?
To cover a gable with uPVC cladding will take no more than a day while cladding half a house would take approximately 1-2 days and a whole house, depending on size, 2-3 days. The way the cladding is installed may increase the installation time, for example, if the cladding is being fitted diagonally rather than horizontally or vertically.
If the work involves removing old cladding that is being replaced, then the process will take longer, and the cost of labour will also increase. Of course, this is something you could do yourself to reduce the time that the fitters are on-site and reduce your labour costs.
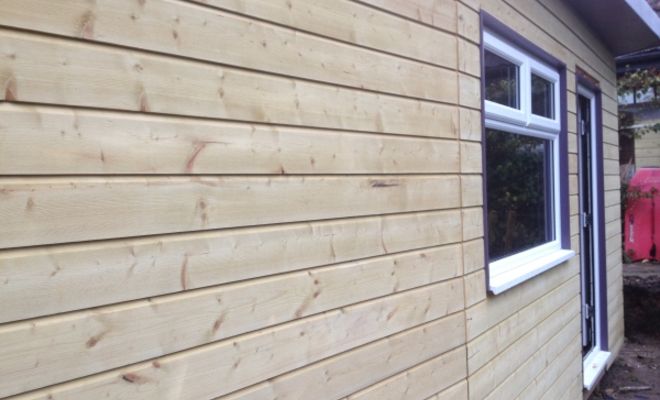
What is uPVC Wall Cladding?
External wall cladding protects the structural walls of a house from the weather, it can incorporate insulation to improve the energy performance of the property, and it contributes to the external appearance. uPVC cladding consists of lengths of un-plasticised polyvinyl chloride (uPVC), which is a type of rigid plastic.
There are two main profiles or shapes of uPVC cladding commonly available: shiplap and V-joint, which both come in a range of colours and woodgrain effect options.
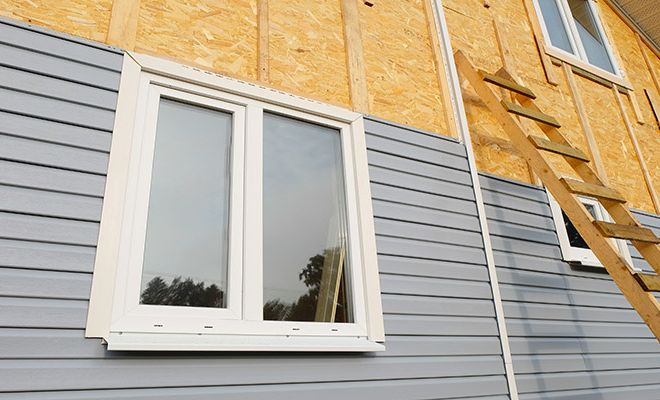
It can be applied to the exterior of a house via a framework of timber battens fixed to the walls. The choice of uPVC cladding means that once it is installed, it requires very little maintenance.
Unlike timber cladding which will require regular protection from the effects of the weather uPVC will not degrade or rot and will look good with just being washed down occasionally.
It will provide a layer of protection for the external walls by repelling water, and good quality uPVC cladding will contain UV-resistant titanium-dioxide, which means that sunlight will have minimal impact and the colour should not fade.
uPVC cladding can be used on house renovations, new builds or as a refurbishment of the exterior of your home to give a fresh look. There are a variety of styles and colours, so there is a choice for most types of home.
It can be used as a feature, for example, just on a gable wall or combined with other materials such as brick or render to blend into its surroundings.
Cost Affecting Factors of Fitting uPVC Wall Cladding
The location of your property within the UK will also influence the price of the project as will the ease of access to the area to be clad.
In general, there is a definite cost difference between London and the rest of the country, and this also applies to any home improvement works that you need to hire tradesmen for such as fitting uPVC wall cladding.
Overheads such as insurance and premises rental are higher in this area; therefore, costs are more when contracting professionals to carry out work in your home. If you are having your uPVC cladding professionally installed then the company will provide their own scaffolding.
There are many other things to consider when you decide to install cladding on the exterior of your home, and the uPVC cladding cost will also depend on several other factors:
- Size of Area - For example, cladding a gable end or a porch will be less expensive than covering a whole house.
- Scaffolding - If you are carrying out the work yourself, you will need to decide if you are going to have professional scaffolding put up or work from a scaffold tower or ladder.
- Site Access - An awkward or difficult to reach area will involve more labour and therefore may incur more costs.
- Type of Cladding - There are different profiles such as shiplap and V-joint as well as plain white or coloured, woodgrain effect.
The cheapest option is the plain white uPVC cladding which can look aesthetically pleasing if done properly. Of course, you may decide to mimic timber cladding with a low maintenance option such as wood grain uPVC which will cost more than plain white but creates a more upscale look.
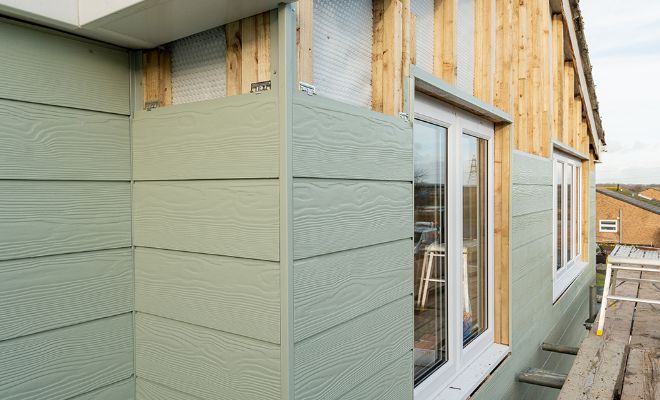
What Does Fitting uPVC Wall Cladding Entail?
The first consideration with an external uPVC cladding installation will be what look you wish to achieve and which direction it will be installed. Most types of uPVC cladding can be fitted horizontally, vertically, and diagonally.
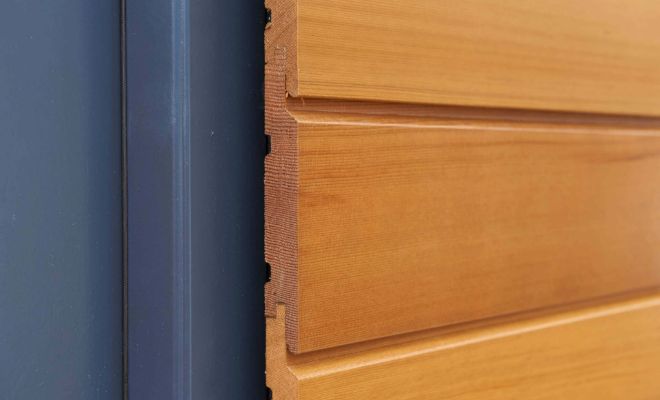
There are two different profiles of uPVC cladding, shiplap and V-joint. Both use a tongue and groove connection system with shiplap having a longer lip than V-joint.
Which style you choose will also determine how much cladding is needed as shiplap boards cover 0.75 square metres while V-joint covers just 0.5 square metres.
To ensure that it is accurate enough, cladding measurements should be taken of the area to be covered, and a 10% allowance made for cuts and wastage.
- Most sub-surfaces that uPVC cladding is fitted to will require the addition of preservative-treated timber battens.
These are fixed to the external walls to accept the fixings for the cladding trims and boards. - The vertical timber battens are normally 25mm x 38mm to allow for adequate ventilation behind the cladding.
- These battens are placed at 600mm centres, and all the battens should be checked with a level to ensure consistent evenness of the boards.
- Once the battens are fitted, the fixing trims are nailed into place to accept the boards. Stainless steel cladding pins are most commonly used for this.
- The trims at top and bottom are normally a variation of a universal channel, or U channel with the corner trims accepting boards at a 90°angle.
Edge and drip trims are installed around windows. - Starter trim is used at the bottom of the installation, and this provides a neat finish.
- Starting at the bottom, the first board is installed with a 5mm expansion gap allowed at each end.
- Boards are nailed first in the centre and then at each end.
- The installation is done from the bottom to the top with regular checks that the boards are being fitted level.
- The overlap of the subsequent boards hides the fixings of the preceding board, so the nails are never visible.
- At the top of the installation, it may not be possible to fit a complete board, and this may need to be cut to fit.
- Most uPVC cladding boards come in 5 metre lengths. If the area covered is longer than 5 metres, then a joint trim is used to butt lengths together.
- When all the boards have been fitted, a cover trim is used to hide the edges at the top and corners.
Quotes for uPVC cladding do not normally include any additional insulation or backing felt, so if you require extra insulation to improve the thermal properties of the external walls, then this would normally be quoted separately.
Most new uPVC cladding boards on the market are white, and although there is a wide choice of colours available today, white is much cheaper and therefore much more common.
Choosing uPVC Wall Cladding
The two most common profiles used in external uPVC cladding installations are shiplap and V-joint or tongue and groove.
The names refer to the way the boards fit together.
This can also have an impact on their respective strength, structural integrity and of course, appearance.
Shiplap Cladding Costs
The term 'shiplap' refers to any kind of board or cladding that is laid so that one overlaps the one below.
It is a very effective way of weatherproofing, and the technique may have originated in shipbuilding.
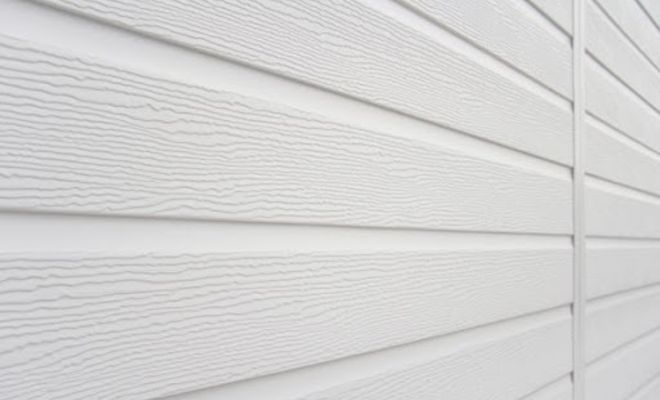
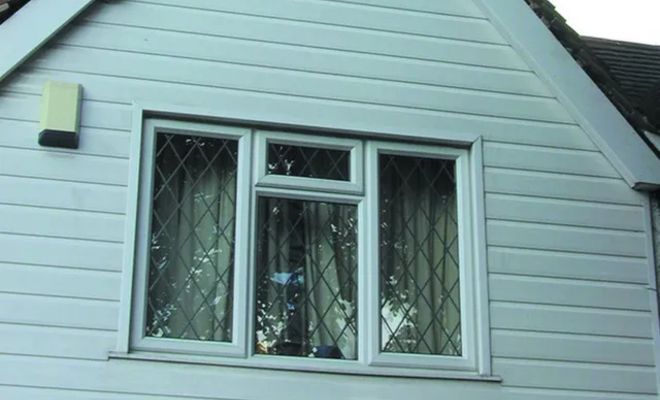
uPVC shiplap cladding boards are usually around 150mm wide and come in 5 metre lengths. They are available in white as well as several other colours and also in different effects such as woodgrain or render.
Installing this type of cladding is relatively straightforward and easy as the boards fit together by a clip system so could be done as a DIY project.
They are lightweight yet very durable and require little maintenance to keep them in good condition. uPVC shiplap cladding can be used to cover large external wall areas and provide effective wet weather resistance as well as a degree of thermal enhancement.
The average shiplap uPVC cladding cost per square metre is £25-£45.
Pros of uPVC shiplap cladding:
- ✔ Longer lip provides better protection against moisture and rain.
- ✔ Better for areas where the weather is harsh.
- ✔ Aesthetically improves the exterior of a property.
Cons of uPVC shiplap cladding:
- ✖ Guaranteed for only 10-20 years.
- ✖ Colours of some poorer quality products may fade in strong sunlight.
- ✖ Top-quality can be as expensive as timber cladding.
V-joint Cladding Costs
V-joint cladding is also called tongue and groove cladding and is fitted together to give a tight join between the boards.
The protrusion or 'tongue' on one board slots into the channel or 'groove' in another board making a weather-resistant connection.
The typical size of V-joint uPVC cladding is around 100mm, and it normally comes in 5 metre lengths. The boards are easy to install as they are quite light, although they are robust and provide a good level of protection for the exterior of a house.
V-joint cladding is available in a variety of colours and can be formed with a woodgrain or textured render effect to mimic more natural products. It is relatively simple to install and can be done as a DIY project.
The boards are lightweight, making them easy to handle and the installation process is not complicated. This type of external cladding is more suited to smaller areas such as gable ends or as a design feature on the outside of a property.
The average V-joint uPVC cladding cost per square metre is £30-£60.
Pros of V-joint cladding:
- ✔ Gives a neat finish as boards are locked close together.
- ✔ Protects against the elements and is a good insulator.
- ✔ Strength of the join between boards makes it a sturdy option.
Cons of V-joint cladding:
- ✖ Poorer quality material may allow gaps due to shrinkage or warping
- ✖ Hard to remove and replace a single piece if damaged.
- ✖ Best suited to coverage of smaller areas such as gable ends.
uPVC Shiplap Cladding vs V-Joint Cladding Summary
Shiplap is ideal for a larger area, it's also easier to install and works out cheaper (£25-£45 per sqm). V-joint is more durable, with a tighter fit and is more expensive (£30-£60 per sqm) however well-suited for smaller areas.
Alternatives to uPVC Wall Cladding
There are several alternatives to the uPVC cladding that you could consider.
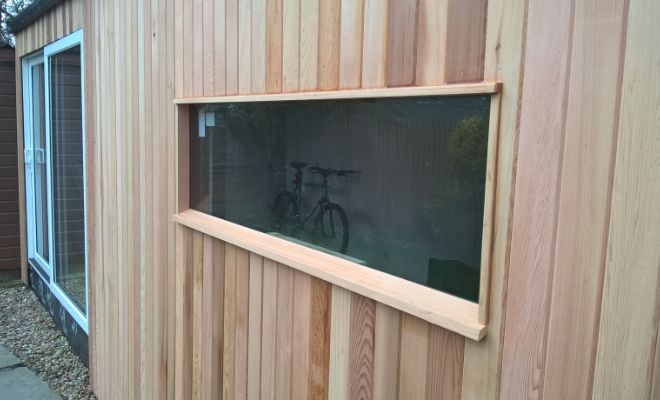
The most common is timber cladding which is available in different types of timber which are suitable for external exposure.
Timber Cladding
Timber cladding has become very popular in recent times, and one of the most popular choices is cedar. This is one of the types of timber which are most suitable for external cladding due to their natural ability to resist moisture and insect attack.
Larch, oak and Douglas fir are some of the other popular choices due to their durability. Installation of timber cladding is potentially trickier than uPVC as if it is not done correctly the timber can deteriorate and rot.
For this reason and the fact that the timber boards will be heavier and more difficult to handle this may be a job for a professional installer rather than a DIY effort.
Timber cladding provides a beautiful finish to the exterior of a home, and it also gives a layer of weather protection. However, it will require regular and proper maintenance to keep it looking good and providing protection to the external walls.
Pros of timber cladding:
- ✔ Natural and beautiful appearance.
- ✔ Looks good for contemporary or traditional settings.
- ✔ A sustainable product with a long lifespan.
Cons of timber cladding:
- ✖ Will probably require professional installation to ensure longevity and quality.
- ✖ One of the most expensive options for external cladding.
- ✖ Needs regular maintenance to keep it looking good and functioning as protection.
Fibre Cement Cladding
Fibre cement cladding is an engineered mixture of sand, cement and cellulose fibre that is moisture, insect, and fire-resistant. It will not rot and will not shrink or split so is extremely durable.
As a cladding, it offers both decorative and protective properties and is available in coloured and textured finishes. Fibre cement cladding can be installed horizontally, vertically, or even diagonally.

It is relatively easy to install, albeit labour intensive, and there are tools that can be used so that the installation can be carried out by one person. This type of cladding can be used in conjunction with other materials to create a bespoke effect that can be either classic or contemporary.
Pros of fibre cement cladding:
- ✔ Resistant to fire, pest, and moisture damage.
- ✔ Will not shrink or crack with temperature changes.
- ✔ Relatively easy to install.
Cons of fibre cement cladding:
- ✖ Can look industrial on a domestic property.
- ✖ Any cut edges have to be sealed prior to fitting.
- ✖ Specialist tools required for cutting and trimming.
Brick
Brick cladding is formed by attaching brick slips to a backboard with a strong epoxy adhesive, and these are then fitted to the exterior of a building. The fixings on the panels are then hidden when the bricks are pointed, meaning that the look is very authentic, but the process is relatively quick.
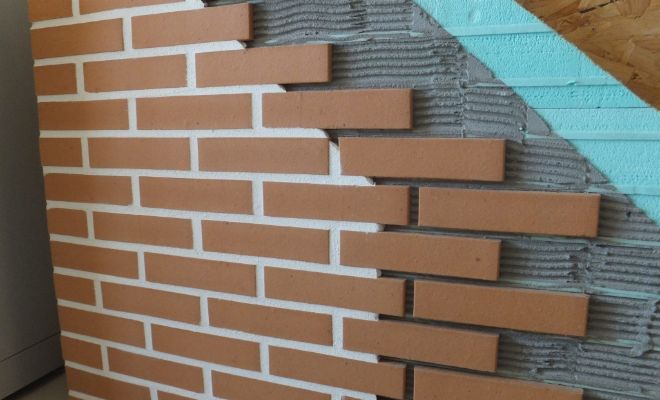
This type of cladding can be done as a DIY job, and any size of brick slip can be attached to the backing board, making it an easily customisable option. There are GRP (glass reinforced plastic) brick slip panels available too, but these are more temporary and suitable for structures that require a lightweight cladding such as a film set or in a theme park.
Pros of brick cladding:
- ✔ Can achieve the look of a brick-built building but is quicker and less labour intensive.
- ✔ It is possible to install this type of cladding as a DIY project.
- ✔ Any size of brick slip can be added to the backing board, making it bespoke.
Cons of brick cladding:
- ✖ Close examination will show that the facade is cladding rather than full brickwork.
- ✖ If one brick slip is damaged it may be necessary to remove the whole panel.
- ✖ May not last as long as genuine brickwork.
Stone
Stone cladding encompasses a wide variety of styles, designs and textures which can be used externally or internally. There are as many types of stone cladding as there are types of stone so depending on what look you are hoping to achieve there is likely to be a stone cladding option to suit your project.
It can be used as a feature on just one wall or as a complete facade for an entire building. Stone cladding can be installed by anyone with competent DIY skills and does not have to be professionally fitted.
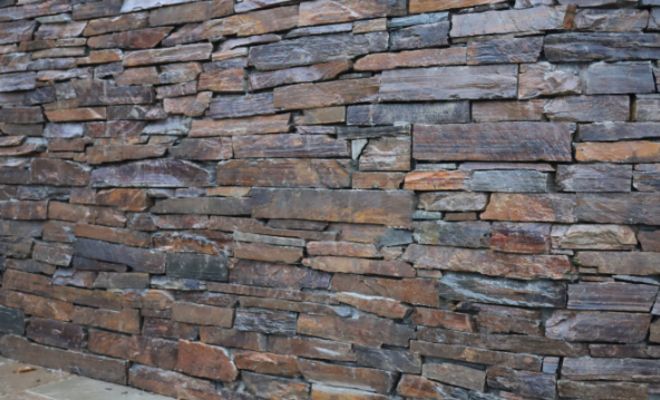
There are some areas where stone cladding is not suitable for example around a swimming pool or where there is running water as the stone may become discoloured. Applying stone cladding will not increase the strength of the wall it is applied to and should not be considered a reinforcing agent.
Pros of stone cladding:
- ✔ Does not require professional installation and can be done as a DIY project.
- ✔ Gives a building character and a solid appearance.
- ✔ Can be applied to most wall surfaces.
Cons of stone cladding:
- ✖ Requires substantial preparation for some wall surfaces prior to installation.
- ✖ Some stone cladding may need to be sealed regularly to protect it.
- ✖ Salt deposits can appear on the stone surface as moisture evaporates through it.
Render
Render is the most commonly used external wall covering for protection and decoration and has been around for a long time. There are several different types of render so which you choose will depend on the needs of the building, the location, and your budget.
Mineral render is a mixture of cement, lime, and polymers. It is a breathable external wall covering and as such is one of the quickest drying when applied.
Although it is a durable product it does require painting to protect it. Silicone render is an effective waterproof render and is often pre-coloured meaning that it will not require painting after application.
As it repels water it also repels dirt which means that it has an element of self-cleaning. Acrylic render is quite durable but not as waterproof as silicone render.
That said it will resist cracking and comes in various colour options which maintain their vibrancy longer than surface paints. Render can be applied as a smooth or textured coat according to personal preference.
Most renders need painting after application, adding to the overall cost.
Pros of render:
- ✔ Pre-coloured versions remove the need for post application painting of the wall.
- ✔ Silicone render is hardwearing, water resistant and self-cleaning.
- ✔ Render protects underlying brickwork from the weather.
Cons of render:
- ✖ Cannot be effectively applied as a DIY job and requires professional application.
- ✖ Often seen as an old fashioned option for external walls.
Summary for Type of Wall Cladding
For a budget-friendly and low-maintenance option, choose uPVC Shiplap or V-joint.
When it comes to the materials, timber and stone offer a natural beauty, however they both require regular upkeep. Fibre cement and brick provide durability, however the ease of installation does vary.
Render is the most cost-effective alternative to wall cladding, but always requires a professional application.
Benefits of uPVC Wall Cladding
There are many benefits to installing uPVC cladding on the exterior of a property from instantly transforming the look to protecting the structure of your home.
Home Improvement
The instant change in appearance to the exterior of your house that uPVC cladding will achieve can enhance the look of your home in a very short period of time.
The ease of installation for uPVC cladding means that within a couple of days your home can be transformed and given an impressive uplift.
uPVC cladding can be used to replace rotten timber cladding or to cover up unsightly render or poor brickwork, simultaneously giving your house a refreshing makeover.
Low Maintenance
uPVC cladding requires little maintenance due to its resilience and durability. Once installed the most that it will need is occasional washing down with a diluted detergent solution to remove dirt and grime.
Timber cladding is prone to rot and insect attack and requires regular maintenance to keep it looking good, so uPVC is a good alternative.
Protection
By fitting uPVC cladding you are protecting your walls from the worst effects of the weather. As a durable and robust material uPVC will resist the damage from heavy and prolonged rain, harsh frosts, and strong sunlight.
Uncovered brickwork will suffer from the impact of adverse weather and temperature changes so installing cladding will help to preserve it especially the pointing which is prone to cracking.
Appearance
There is a wide range of colours and textures available in uPVC cladding so it is possible to choose a product which will alter the look of your home completely. This is a quick and inexpensive way to change the appearance of the property whilst also protecting the external facade.
DIY Fitting uPVC Wall Cladding
An external uPVC cladding installation can be done as a DIY project with some planning and the correct tools.
First, you need to decide which type of profile you want and whether you want to install it horizontally, vertically, or diagonally.
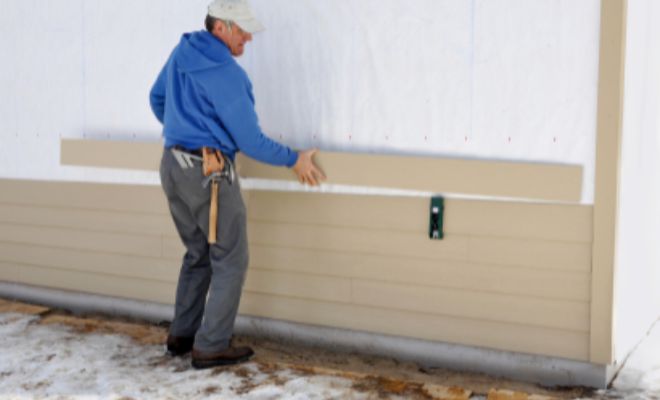
As with any DIY or home improvement project, it is important to work carefully to avoid injury. Having the right tools to do the job will also reduce the risks of personal injury or accidents.
Tools Required
The following is a recommended list of tools for installing uPVC cladding as a DIY project:
- Measuring tape
- Level
- Pencil for marking
- Fine tooth saw
- Hammer
- Stainless steel cladding nails
Dangers of DIY uPVC Cladding Installation
Any DIY project can be dangerous but particularly work that is done at height should be approached with caution.
If you are working from a ladder or scaffold tower, then you should have another person with you to hold the ladder or to pass tools and materials to you safely on a tower or platform. Using a saw or power tools can result in cuts if used incorrectly or without full attention and crush injuries can occur from heavy equipment or materials trapping fingers or limbs.
Working carefully and attentively should reduce the risk of accidents or injuries, but it will never be completely eliminated, so any DIY work should be undertaken with care.
Personal Protection Equipment
Safety equipment recommended for DIY installation of uPVC cladding:
- Gloves
- Safety goggles
- Safety boots
uPVC cladding installation can be done under permitted development and as such does not need to be signed off by a professional as it does not fall under Building Regulations.
If you are replacing old cladding with new, then you could remove this yourself and pay a professional to fit the new cladding.
This would save you some of the labour cost, which can be between £250-£300 for a team of two people.
DIY Wall Cladding vs Professional Wall Cladding
Wall cladding is a serious job and one that can be time consuming, coming with great difficulty if you don't have the right skills. As such we've summarised the pros and cons of DIY vs Professional, although we'd highly recommend getting a quote from someone who knows how to go about the work required.
Pros of DIY Installation
- ✔ Cost saving as no labour charges
- ✔ Flexible and customizable installation process
- ✔ A satisfying DIY accomplishment
- ✔ Potentially quicker if you already have the right tools
Cons of DIY Installation
- ✖ Risk of accidents, due to danger working at height or with power tools
- ✖ Requires time, effort, and skill to ensure a quality finish
- ✖ Can become costly if mistakes are made during the installation
- ✖ No professional guarantee or warranty for the finished work
Pros of Professional Installation
- ✔ High-quality, expert installation with a guaranteed result
- ✔ Safe and efficient, especially when assessing risks such as working at height
- ✔ Time-saving with professionals completing the work quickly and correctly
- ✔ Work often comes with a warranty or guarantees for peace of mind
Cons of Professional Installation
- ✖ Higher cost due to paying labour charges for the staff
- ✖ Less flexibility as need to fit in work with other jobs
- ✖ No personal involvement or satisfaction in the process
Cost of removing uPVC Wall Cladding
Cladding is one of those aspects of a property that you either like or dislike. If you purchase a property which has uPVC cladding you may want to remove it completely or replace it with new uPVC or timber cladding.
Cost to Remove uPVC Cladding
The cost to remove cladding will be around £150-£250 per day. This work could be done by one person but most often there will be a team of two and this means the job will be completed quicker.
Of course, you could remove the uPVC cladding yourself and save the cost of hiring someone to do it for you. The process is relatively simple, but you should be aware that working at height can be dangerous, and it is recommended that you have another person helping if only for safety reasons.
Disposing of old uPVC cladding may pose a problem as most local authority recycling centres do not have the facility to accept them. There are specialist companies which operate solely in the market of recycling materials that cannot be disposed of in recycling centres, but some will charge for their service.
The prices will vary, and it is a good idea to get a quotation before you commit to using the services of one of these companies. Other companies will actually pay you for your old uPVC, so it is worth researching your options locally.
Timeframe to Remove uPVC Cladding
Depending on the amount of cladding to be removed, it should take 1-2 days provided that it is a straightforward job.
The task of removing something such as uPVC cladding is always easier than installing it however care should be taken if the existing cladding is to be replaced with new cladding as you may want to maintain the framework of timber battens in order to affix the new cladding.
How to Find & Hire a uPVC Wall Cladding Fitter
While it is possible to fit uPVC cladding yourself many people prefer to hire a professional and experienced fitter to do the work. Some are not confident enough in their DIY capabilities or not comfortable working at height.
There are, of course, those who are elderly or physically not able to do the work themselves, and in these circumstances, it will be necessary to hire a professional fitter.
Cost to Hire a uPVC Cladding Fitter
The cost to hire someone to fix uPVC cladding to your house will depend on the size of the property, the amount of cladding to be fitted and the area that you live in.
The cost to install uPVC white shiplap cladding to an area of approximately 50 square metres is around £1500-£2000 while to fit coloured V-joint uPVC cladding to an area of 150 square metres will cost in the region of £8000-£9000.
How to Find a uPVC Cladding Fitter
The best route to finding a competent and reputable contractor to work on your home will be through recommendation.
If you know people who have had similar projects carried out on their property then you could ask about the service they received, the quality of the workmanship and the treatment of their home while tradesmen were working on it. These are all useful pieces of information, but of course, you also want to find out about the qualifications and experience which you can ask a contractor directly about. The kind of trade that would normally do this work include roofers and general builders.
Insurance
Anyone working on your home, especially if they're going to be working at height should have insurance in place such as public liability and professional indemnity insurance. Public liability insurance as the name implies is designed to protect members of the public from any illness or damage caused by the tradesman's actions.
Professional indemnity covers claims made by the client of the tradesman against negligence or mistakes in the work carried out.
FAQs
You can either use a sponge and clean it by hand or use a pressure washer.
If cleaning by hand from a ladder make sure you have someone to hold the ladder steady while you work and do so safely.
If you use a pressure washer, keep it on the lowest setting so as not to damage or dislodge the uPVC cladding.
Both profiles incorporate a tongue and groove joint, but shiplap cladding has a longer lip. This allows for greater water run-off.
However, V joint cladding has a tighter joint which can give a cleaner finish and appearance. Therefore, the choice of profile will depend on why you fit the cladding, for appearance or for weather protection.
It is not recommended for buildings which exceed 18 metres in height.
Under Building Regulations, a cavity barrier should be fitted underneath the cladding.
For most surfaces, timber battens will need to be fixed to the wall first and the uPVC cladding attached to this framework.
For a rectangular area such as a wall measure the height and the width and multiply these together to get the overall area.
You should add 10% to allow for cuts and wastage.
For a triangular area such as the top of a gable wall multiple the length of the two gables together, divide by two and add 10% for wastage.


