Rubber Roofing Cost
Last updated 20th May, 2025
Want to know how much rubber roof installation costs in 2025?
We cover everything that you need to know in this rubber roofing cost guide!
You'll find how much different types of rubber roofing cost per m² (in total, with materials and labour), a breakdown of current prices for rubber roofing materials, additional costs you might need to budget for, and much more!
Let's get started...
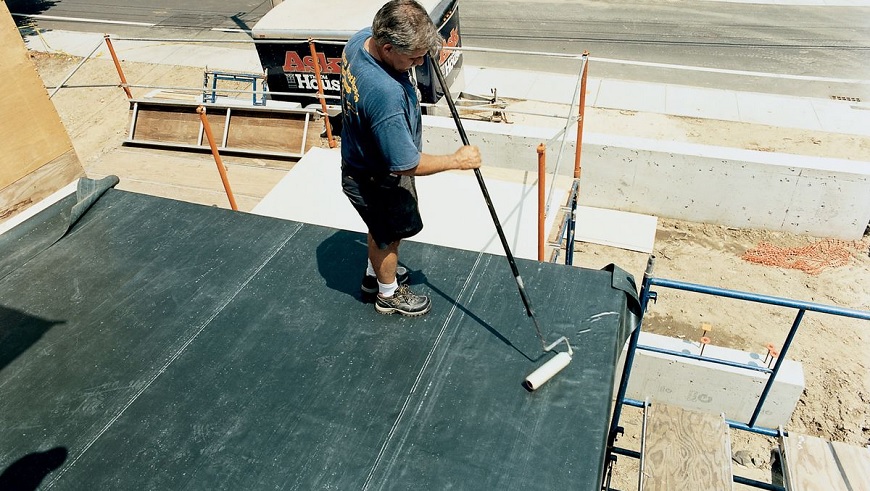
Table of Contents
- How much is rubber roofing?
- Rubber roof prices
- Supply cost of rubber roofing
- Additional rubber roofing installation costs
- Labour cost to install a rubber roof
- Factors that impact rubber roofing costs
- What does installing a rubber roof involve?
- DIY rubber roofing
- Rubber roof prices per m²
- Rubber roofing vs flat roof alternatives
- Benefits of rubber roofing
- Building regulations for rubber roofing
- Planning permission for rubber roofing
- Rubber roof maintenance
- Removing rubber roofing
- FAQs
- How to find & hire a rubber roof specialist
How Much is Rubber Roofing?
Let's start by taking a look at average rubber roofing costs for a 12m² roof.
For a roof of this size, you should expect rubber roofing costs to be between £720 and £960. Typically, a rubber roof membrane costs around £220 to £900 for a roof that's about the same size.
The cost of firestone rubber roofing would land between £156 and £600 for for this size roof, too.
Rubber roofing installation costs are normally around £200 per day across the UK. However, this will vary depending on ease of access, the size of the roof, the type of rubber roof material, and where you're located in the UK.
Rubber Roof Prices
| Type | Price Per Square Metre |
|---|---|
| EPDM | £60 - £80 |
| Firestone Rubber Roof | £13 to £50 |
| Rubber Roof Membrane | £15 - £75 |
| Liquid Rubber Roofing | £1.20 - £2 |
Supply Cost of Rubber Roofing
In this section, we’ll look at the material costs of rubber roofing specifically, so excluding the labour costs. We’ll also look at the cost per square metre for different types of rubber roofing, which is particularly relevant if you plan to fit EPDM by yourself.
The average supply cost of EPDM or regular rubber roofing ranges from £60 to £80 per square metre.
The supply cost per square metre for firestone typically lands around 13 to £50.
For rubber roofing membrane, you should expect to pay about £15 to £75 for materials.
In the case of liquid rubber roofing, the cost per square metre is just £1.20 to £2.
Additional Rubber Roofing Installation Costs
There are plenty of additional jobs you may need or wish to pay for on top of the initial rubber roof cost. Let’s take a look at some potential examples.
Hiring Scaffolding
You may need to hire scaffolding as part of the job. Any work that takes place six above a level below should involve the use of scaffolding for reasons of safety and practicality.
Scaffolding involves assembling sections of scaffold to create a structure that can be ascended for working at a height.
Below are the approximate costs for hiring scaffolding during your rubber roof installation:
| Type of Scaffold | Price Range |
|---|---|
| Narrow Scaffold Tower | £1300 to £2700 |
| Standard Scaffold Tower | £800 to £2500 |
| Double Scaffold Tower | £1500 to £3500 |
| Trestle/Access Platform | £200 to £280 |
Although it's worth noting costs may vary on factors such as how long you require the scaffolding and the volume needed. Likewise, where you are located can affect the cost too, with London and South East prices likely to be higher than elsewhere in the country.
Cleaning a Roof
Once your rubber roof is installed, it will need to be kept maintained, which involves keeping it clean from dirt and debris.
One of the most common ways of cleaning a roof involves the use of a pressure washer. Pressure washing isn't always suitable for every rubber roof, and although there are other methods this is often the main approach when hiring a professional.
Below we take a look at at the prices you can expect to be charged:
| Roof Type | Terraced/Semi-Detached | Detached House |
|---|---|---|
| Gable Roof | £400 to £500 | £500 to £600 |
| Hip Roof | £550 to £650 | £800 to £900 |
Rubber Roof Cost Breakdown Calculator
Individual costs of hiring a roofer to install EPDM rubber roofing on a 12m² semi-detached roof: £1,360
Materials
£960
Labour
£400
Waste Removal
£0
Labour Cost to Install a Rubber Roof
A roofer charges roughly £20 to £30 per hour or approximately £200 per day. With the average rubber roofing job taking between one and two days, the labour cost is usually somewhere between £200 and £400 altogether.
The labour is part of the total cost, alongside the supply costs and any waste removal expenses. The setup should take an hour or less but the work itself can take several days depending on the scale of the job.
In most cases, the clean up will take an hour or less. Both the labour costs and time frames are shaped by ease of access and the state of the work area.
Factors That Impact Rubber Roofing Costs
There are a variety of factors that will shape the cost of installing rubber roofing. Let’s break down some examples.
Size of Roof
To start with, the size of the roof is relevant to the cost, primarily due to how it would impact on the cost of supplies.
Beyond that, the larger the roof, the longer the work will likely take and in turn this will probably mean a higher labour cost.
Type of Rubber
As discussed, the type of rubber roofing used is an important cost factor. For instance, while regular EPDM usually costs between £60 and £80 per m², liquid rubber roofing generally costs just £1.20 to £2 per m².
Type of Roof
Roof type is also relevant as the design and layout of the roof is linked to both the size of the roof and the complexity of the roof.
The more complex the roof is in its design, the more difficult the installation will be and therefore the labour costs are likely to end up higher.
Scaffolding Needed or Not
If scaffolding is required, this could add several hundred or more likely, several thousand pounds to your overall bill.
Of course, how much exactly you’d end up spending of scaffolding if it’s needed will vary depending on the type of scaffolding used and how tall it is.
Location of Property
As for property location, this is relevant since roofers charge different rates in different parts of the nation.
For instance, the highest labour prices are usually found in the southeast and London especially but in the north of England, Northern Ireland, and Scotland, labour rates are usually below the national average.
Ease of Access
How easy the roofing area can be accessed by the contractor(s) your hire will likely play a role in shaping the cost of rubber roofing.
Again, this is because of how this cost factor can relate to how long the work will take and therefore this can influence the overall labour cost.
What Does Installing a Rubber Roof Involve?
We’ll now take a look at the steps involved in installing rubber roofing.
1. Hiring a Professional
Unless you wish to install rubber roofing DIY, you’ll first need to choose the right contractor/company for you. It is best to get three quotes before making a decision and you should also ask for some references.
2. Preparation
The first practical step involves ensuring that the roof area is clean, dry and free of any dirt, dust or other loose material.
It’s important the existing roof is in the right condition for the installation of rubber roofing. Of course, the exact installation process will vary depending on the type of rubber roofing used.
3. Initial Work
At this point, the roofer will install drip batten by the gutter before adding drip back drip trim. Then, they may chase out brick mortar joint with a mortar chiseler or angle grinder.
A rubber membrane, if applicable, should be laid across the roofing area and given 30 minutes to sit. Next, the membrane should be folded in half.
Lastly for this phase of the job, a nine inch paint roller should be used to add deck adhesive.
4. Installing the Rubber Roof
The EPDM should then be applied/installed. Next, contact adhesive should be added to the roof perimeter. As soon as this adhesive dries, a penny roller can be used as a final touch.
The roof membrane, again, if applicable, can then be folded on a roof corner. Next the trim corner should be installed before adding an appropriate water deflection product.
Then, the joint clips should be fitted before a gutter trim may be installed. Lastly, any excess rubber membrane should be removed.
DIY Rubber Roofing
It is possible to install rubber roofing DIY but you should only undertake this work by yourself if you’re absolutely sure of what’s involved, have the appropriate skills and know all of the safety precautions necessary. If in doubt, it’s best to hire a professional.
As with any DIY work, there are risks and hazards to consider. For instance, you could fall if working at a height or you could injure yourself using the tools and equipment needed for the job. Generally speaking, these are the tools you’ll need:
- Paint Roller
- Mini Roller
- Paint Brush
- Scissors
Of course other tools and equipment may also be required and it will depend on the job.
As for safety equipment, you’ll need:
- Safety harness
- Protective gloves
- Protective shoes
Scaffolding may also be required but even if it’s not a legal requirement, it’s worth considering either way. You’d most likely save around £200 to £500 in total if you undertake the work DIY.
If building regulations approval is required, then a building control officer would need to inspect and sign off your work.
Rubber Roof Prices Per M²
We’ll now look a little closer at the various types of rubber roofing. The following subsections will also consider how much they cost and what their pros & cons are.
EPDM Roofing Cost
Ethylene propylene diene monomer or EPDM rubber is a form of synthetic rubber that in the context of roofing is used to cover a roof as an external/surface layer. EPDM or regular rubber roofing costs about £60 to £80 per m².
Pros:
- ✔ Fairly eco-friendly
- ✔Relatively straightforward to apply
Cons:
- ✖ Damage may occur
Rubber Membrane Roofing Cost
Rubber roofing membranes are sold as rolled up products. Membranes are fairly easy to lay out and install. On average, a rubber roofing membrane costs around £15 to £75 per square metre.
Pros:
- ✔ Easy to install
Cons:
- ✖ Not too expensive in terms of rubber roofing cost
Firestone Roofing Cost
As for firestone, this is a type of rubber roofing that is specifically meant to provide waterproof qualities to small flat roofs of no more than 100m² in area.
For instance, firestone rubber roofing may be used on the roof of a garage, extension, dormer or shed. Cost-wise, firestone rubber roofing usually lands between £13 and £50 per m².
Pros:
- ✔ Tends to be inexpensive
- ✔ Well-suited to small flat roofs
- ✔ Great for waterproofing
Cons:
- ✖ Not suitable for all roofs
Rubber Liquid Roofing Cost
Alternatively, you could purchase rubber roofing in a liquid form with a cost of around £1 to £1.20 per m².
This product, however, can prove a little messier than other options. Liquid rubber roofing also generally comes with fire-resistant properties. Installing liquid rubber roofing can also be more challenging.
Pros:
- ✔ Least expensive
Cons:
- ✖ Can be messier
- ✖ May be more difficult to install
Rubber Roofing vs Flat Roof Alternatives
Before we take a look at the benefits of rubber roofing in more detail, it's worth pointing out there are other alternatives available. If you're unsure which material is best for your roof, always ask the advice of a professional:
| Material | Lifespan | Pros | Cons |
|---|---|---|---|
| EPDM (Rubber) | 30–50 years | Durable, low-cost, flexible, low maintenance | Poor insulation, absorbs heat, weak seams if not fitted correctly |
| TPO | 15–30 years | Reflective, strong seams, energy-efficient | Newer material, inconsistent in quality |
| PVC | 20–30 years | Excellent chemical/fire resistance, reflective | Higher cost, can shrink or become brittle with age |
| Modified Bitumen | 10–20 years | Durable, easy to repair | Shorter lifespan, less flexible, requires maintenance |
Benefits of Rubber Roofing
Regardless of what type of rubber roofing you choose, there are advantages either way with this category of roofing. Let’s take a closer look at some of the benefits.
- Durable - Long-lasting and with the right treatment, can last 30 to 50 years
- Weather resistant - Surviving high winds and heavy rain, rubber roofs are very impressive against the elements
- Flexible material - Not only good for roof installation, but will also expand and contract during the change in weather
- Relatively inexpensive - Compared to alternative methods, and especially if you choose liquid rubber roofing
- Low maintenance - Little maintenance is required, requiring sporadic cleaning and repainting once a decade
- Fire resistant - As well as being a safe option, insurance companies sometimes offer a discount as a result
- Eco-friendly - Rubber roofs are made from recyclable materials, making them one of the most eco-friendly options available
- Lightweight - Easy to move and install, being lightweight also puts less strain on the building structure
- Noise insulation - Rubber absorbs sound, and although not fully soundproof is good for damping vibrations
Building Regulations for Rubber Roofing
More than likely, building regulations approval will be required, unless you are simply replacing part of an existing rubber roof.
As for the specific regulation, for instance, you may need to upgrade the thermal element of the roofing. More information is available on Planning Portal.
It should be noted that these regulations are specific to England and Wales and therefore the rules may differ for Scotland and Northern Ireland. If you are unsure about anything, it is best to contact your local council.
Between the cost of submitting a building regulations application and having a survey undertaken, you’d end up paying about £300 to £500 altogether.
Planning Permission for Rubber Roofing
All homeowners have permitted development rights which essentially mean that you do not need to apply for planning permission in those specific circumstances.
However, roofing work is not considered permitted development if:
- Permission to use your home as a dwellinghouse is only granted under Class M, N, P or Q of Part 3 of the schedule (i.e. change of use)
- The changes to your roof will go beyond .15 metres ahead of the plane of the original roof slope (this applies when measuring the roof perpendicular to the external surface of the original dwelling roof)
- The highest part of the alteration would end up higher than the tallest part of the existing roof or the alteration would include the instalment, alteration, or replacement of a flue, soil and vent pipe, or chimney, or the instalment, alteration, or replacement of solar thermal equipment or solar photovoltaics
There are also other conditions relevant to permitted development that relate Class C. Additional information can also be found via Planning Portal.
Applying for planning permission usually costs somewhere in the range of £200 to £500.
Rubber Roof Maintenance
The first and most important form of maintenance to consider is simply cleaning the roof every so often. It’s important to sweep or rinse off debris and grime every so often.
A roof cleaner can also be used to mop the surface of the rubber roofing. It’s best to avoid using too much water during the process.
Roof repairs generally cost somewhere in the range of £300 to £1100, depending on the extent of the repair work required.
If the damage is particularly extensive, you may instead wish to have the roof replaced. This would likely cost you somewhere in the range of £30 to £80 per m².
Removing Rubber Roofing
The process of removing rubber roofing will depend on the nature of the EPDM. Preferably, it should be removed in warm weather conditions as it will then be easiest.
Assuming you have a rubber membrane, the membrane should be cut into small sections with a utility knife before the membrane can be removed.
A homeowner may choose to remove rubber roofing because they wish to install a new type of roofing such as asphalt roof shingles.
This job can be done DIY but if you are unsure about any aspects of the job, you should hire a professional.
FAQs
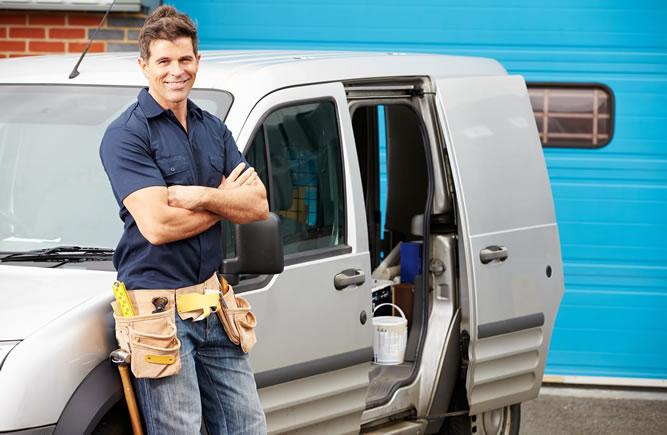
How to Find & Hire a Rubber Roof Specialist
Though it is possible to install rubber roofing DIY, it’s generally preferable to hire a professional. Roofers charge about £200 per day on average.
When hiring a roofer you should find one with experience and accreditation. Ideally they should also have the right insurance.
They may or may not have qualifications such as Level 2 NVQ Diploma, although this is not necessary.
If you’d like to inquire about this sort of information, you can always ask a roofer or their company for more information regarding their qualifications and certifications, if applicable.


