Cost to Pebbledash a House
Last updated 17th April, 2025
Wondering what it costs pebbledash your house?
This article explores pebble dashing in more depth. We look at all the costs involved in applying pebbledash to your home, including what the process entails and the timeframes involved. Plus we look into the supply costs and labour fees.
Let's get started!
How Much Does It Cost to Pebbledash a Home?
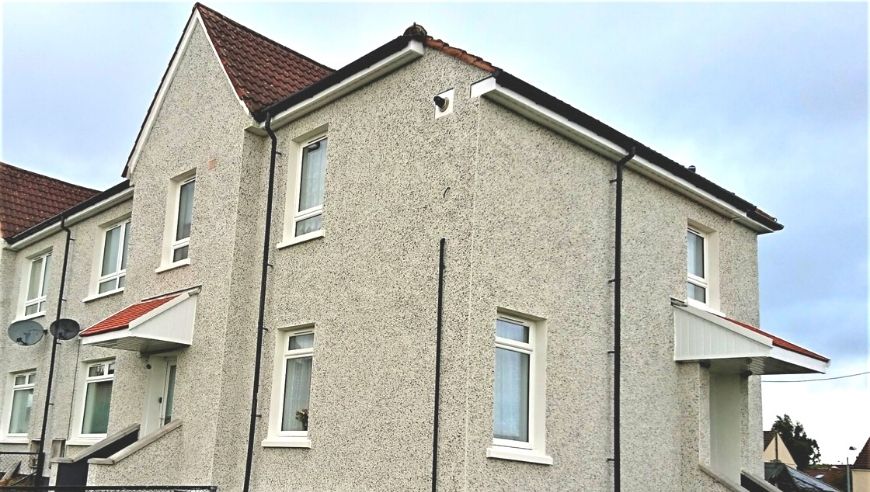
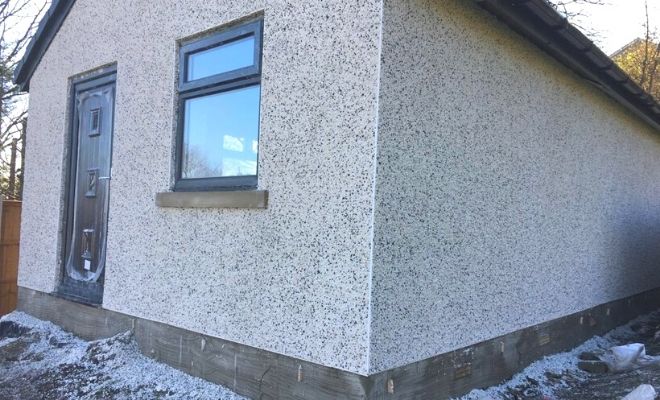
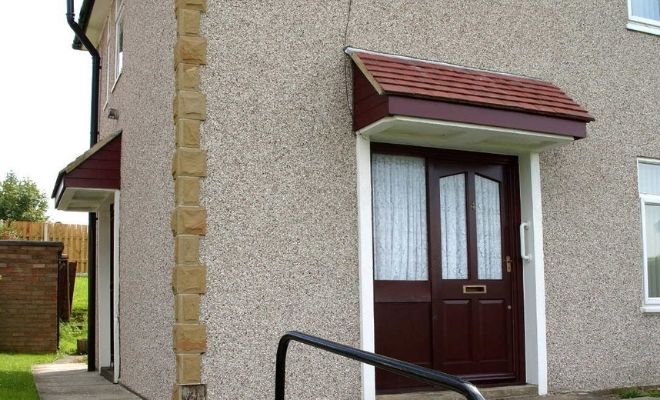
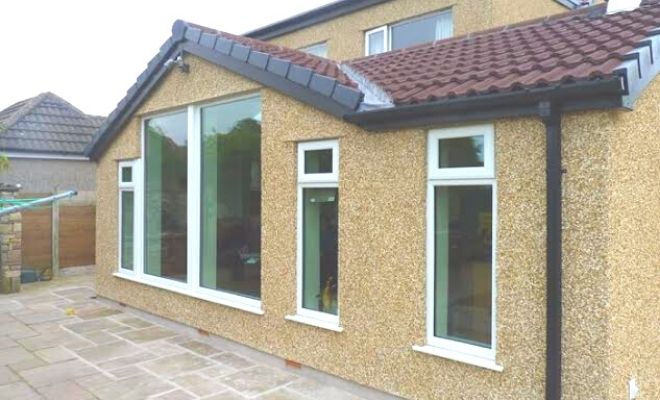
Pebble dashing a house is a cost-effective solution to rendering a property's exterior and providing a good weatherproof finish. Although it has been used as a protective coating for buildings since the early twentieth century, it is still considered a useful way to shield the external walls of a home from the worst of the British weather.
Pebble dashing a home costs will depend on the type of house involved. A typical mid terrace property will cost between £3,750-£4,750 to pebble dash while a large, detached house will cost from £7,500 upwards.
Bungalows are slightly cheaper as they only have a single storey to be covered and will cost £3,500-£4,500 for a detached bungalow and £2,500-£3,500 for a semi-detached bungalow. Larger detached homes can cost as much as £7,500-£8,000 to pebble dash.
There are various pebbledash types that can be sharp aggregate called spar dash or smooth stones, which is the more traditional pebble dash. They come in various colours and combinations but can also be painted over if required.
Roughcast is a type of pebble dash that mixes stones or aggregate directly into the mortar, and this is then applied to the wall. So strictly speaking it is not pebble dashing which involves throwing the aggregate at the render after it is applied to the wall.
The cost to pebbledash a home will depend on the type of property, the pebbledash used, and the location.
As it is a very labour intensive job, the majority of the cost of pebble dashing will be the labour cost, which will be affected by the area you live in. Labour costs in London and the south-east of England will be more expensive than in other parts of the country.
For two-storey homes, a pebble dashing specialist will require scaffolding to be in place, which will affect the overall cost.
Pebble Dashing Prices
Below are pebble dash rendering costs for various types of houses and the average time it will take to complete the work.
| Type | Total Cost | Duration |
|---|---|---|
| Semi-detached Bungalow | £2,500-£3,500 | 4-7 days |
| Detached Bungalow | £3,500-£4,500 | 5-8 days |
| Terraced House | £3,750-£4,750 | 5-8 days |
| Semi-detached House | £5,000-£6,000 | 6-9 days |
| Detached House | £6,000-£7,000 | 8-12 days |
| 4/5 bedroom detached | £7,500-£8,000 | 10-14 days |
Supply Costs
Pebble dashing a home prices for materials only, without the cost of labour.
| Materials | Price per 25kg | Price per kg |
|---|---|---|
| 3mm-8mm aggregate | £3.50-£6.00 | 15p-25p |
| Sand | £2.00-£2.50 | 8p-10p |
| Cement | £5.00-£6.00 | 20p-25p |
Table of Contents
Additional Costs
When you have finished your home's pebble dashing, you may see that it shows up other parts of the property's façade that may need attention or fixing.
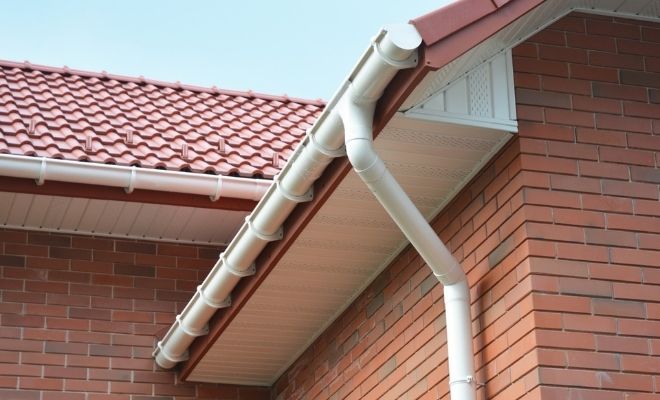
Replacing Guttering
One of the exterior parts of your house that may need replacing is your guttering. Most uPVC guttering will have a finite life and if you are giving your house a facelift with new pebble dashing it may be a good time to replace your guttering.
The cost to replace the guttering on your home will depend on the size of the property and the type of guttering you want to fit. However, the average cost will be between £450-£600.
Painting Fascia & Soffits
If you have had to replace your guttering because it is in a poor state of repair, chances are your fascia and soffits will have suffered too. The cost to rectify this will depend on whether you decide to fix and paint or replace your existing fascia and soffits.
For a three-bed semi-detached house, the cost to paint the fascia and soffits will be around £800, and this would include removing the guttering, repairing, and preparing the fascia and soffits and then painting them. The guttering would then need to be replaced.
Replacing Fascia & Soffits
To replace fascia and soffits on a three-bed semi-detached home would cost around £1,000-£1,500 and this does not include the cost of scaffolding which would add another £800-£1,000 to the cost. In some parts of the UK such as London, the cost may be significantly higher.
Painting Exterior Walls
When your house has been pebble-dashed, you may want to paint it. To paint pebbledash is a tricky and time-consuming task and you can expect to pay between £1,000-£2,000 for a professional decorator to do this work.
Painting pebble dash is different from the usual painting of exterior walls. Due to the texture of the surface, it takes time and patience to get complete coverage.
Painting Your Front or Back Door
To finish off the upgrade of the outside of your home, you may want to consider painting your front and back door. Of course, this will only apply if you have external timber doors and not uPVC or composite.
The cost to paint the front and back doors of your home will be around £150 per door, although it will depend on where in the country you live and the quality of the paint used.
Cost Breakdown Calculator
Individual costs for hiring a specialist to pebble dash walls of a 3-bed semi-detached house - Total Cost: £5,500
Materials
£1,925
Tradesmen
£2,475
Scaffolding
£1,100
Labour Costs and Time Frames
Pebble dashing walls is a labour intensive job, and the majority of plasterers will apply it manually with a trowel, although there are pebble dash sprayers on the market. As a result of the way in which most plasterers apply the dash, the labour cost will equal or outweigh the material costs.
The process of pebble dashing a house is quite involved, and each stage will be somewhat distinct.
Preparation Stage
The preparation stage will involve making sure that the wall surface is sound, clean and without any contaminant which could interfere with the adhesion and function of the pebble dash render mix.
If necessary, a support system such as metal lathing may be used for the scratch coat if the wall surface is uneven or in a poor state of repair. Depending on the house's size and condition, the preparation stage should take 2-3 days.
Scratch or Base Coat
The application of the base or 'scratch' coat may take 1-3 days depending on the property's size and the prevailing weather conditions. For the optimum curing of the base, the weather should not be too cold, too hot, or too wet.
If it is too cold, the render to cure will be longer, and the moisture in it may freeze causing cracking. If the weather is too hot, the pebble dash render mix will dry too quickly and crack. In very wet weather, the wall may be too saturated, and the render may not adhere properly.
Top Coat
This coat will take the pebble dash and needs to be a finer consistency than the scratch coat. It will also need to be of a sufficient depth to function as an effective render to the external wall.
The top coat application will take 1-3 days depending on the property size and the weather but will be done in conjunction with the pebble dashing. This is because the top coat needs to be still wet enough for the aggregate to stick.
Pebble Dashing
Before the top coat of render has dried the pebbles or spar are dashed onto the wall's surface. This is typically done by hand using a trowel to throw the aggregate at the wall to make it adhere to the render.
The time taken to do this stage will depend on the pebble dash specialist's skill, the size of the house and the weather but should be between 1-3 days.
What Will Increase the Cost of Labour and Timeframes?
There are a few things that can increase labour cost and the time taken to pebbledash a property.
Weather
The weather will always have a say in the timeframe of any external construction work, and pebble dashing is as prone to the changing climate as any other work, perhaps even more so. Rendering is a delicate balance of ideal conditions during application and curing or drying out.
The temperature should be above 5 degrees to reduce the risk of frost but not too hot that the render dries out too quickly. Rendering should also not be applied to a wall that has been subjected to persistent heavy rain until it has had a chance to dry sufficiently.
Condition of the Walls
A good pebble dash job is dependant on the various layers and stages of the process being done in the best possible way. This means the quality of the render, the skill of the plasterer and the weather conditions. But if the basis of the job, i.e., the wall, is not in optimum condition before any render is applied, this will inevitably impact the entire job.
Therefore, ensuring that the wall is clean, sound, level and free of contaminants is very important. Time spent on this preparation will be an investment in the quality of the finish. Removing pebble dash previously applied to repair or replace it may cause damage to the wall, which will need to be rectified before applying new pebble dash render.
Cost Affecting Factors of Pebble Dashing a House
Many factors can affect the pebble dash rendering cost of a house from the size of the property to the wall's condition.
Type of Pebble Dash
There are many different varieties of aggregate that can be used to pebble dash houses.
As a general rule, pebble dash stones are typically sized from 3mm-8mm and a 25kg bag will usually cost between £3.50-£6.00.
Below we take a look at the varieties of pebble dashing available:
- Traditional Pebble Dash: Textured finish produced with small pebbles or gravel, using angular spar or combined with smoother chippings.
- Smooth Pebble Dash: Rounder and smoother stones are used to create a more polished finish. Cost is similar to traditional pebble dash.
- Polished Pebble Dash: Using a smooth pebble dash, combined with a fine gravel, the stones are polished after the curing process is complete.
- Exposed Spar Dash: Larger stones such as granite, slate or quartz are placed into the render to create a rougher finish (note: the larger stones can be more expensive).
- Coloured Pebble Dash: For a more decorative finish, a variety of coloured stones and chippings are used. While synthetic options are also available, the price is fairly similar.
Surface Preparation
The wall surface of a pebble dash house should be thoroughly prepared prior to any render being applied to it. If the wall is in bad condition or has cracks, then a fibreglass render mesh can be used to strengthen the application. The mesh is embedded in the base coat and another thin layer of render passed over the top of it.
The fibreglass mesh enables a certain amount of flexibility in the wall with the natural expansion and contraction that occurs at different times of the year. The fibreglass mesh cost depends on the strength of the mesh, and the prices range from £1-£3.50 per square metre.
Size of House
The size of the house to be pebble dashed will obviously impact the cost of the job, the greater the square meterage to be covered, the higher the cost. Typically, a 12kg bag of aggregate will cover a square metre of a wall and a 25kg bag just over two square metres.
As well as the aggregate, there is also the cost of the two render coats, any render mesh and any beading used.
It is recommended that aggregate for pebble dashing is always purchased in bags and not in loose form in order to ensure that the mixture is clean, and no foreign debris gets in. It is also recommended that the aggregate is emptied from the bags into a clean container to ensure an even mixture of colour, size, and texture.
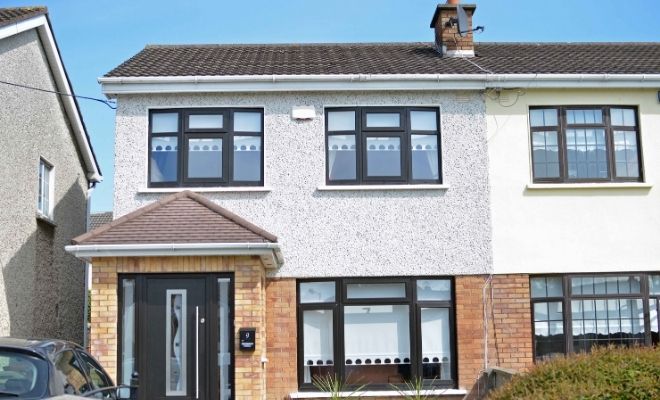
Type of Property
The kind of property that is being pebble-dashed will have an impact on the cost. A mid-terrace house will not have the same surface area to be covered as a large, detached home and therefore there will be differences in the cost.
Similarly, a regular shape house will be more straightforward than a house with more angles and harder to reach areas that may affect labour and scaffolding costs.
Ease of Access
There will be no need for scaffolding for a bungalow, and a plasterer will work from ground level or a low platform. However, it will be necessary for a two storey property to have scaffolding in place, which will be an additional pebble dash rendering cost.
The price of scaffolding will vary depending on where in the country you live, but the average cost will be around £120-£150 per day. However, this price will vary widely depending on where in the country you live in.
Location
Prices for labour and materials are always more expensive in London, and the south-east of the UK due to the higher cost of living and in some instances can be double what they are in other parts of the country.
What Does Pebble Dashing a Home Entail?
The purpose of pebble dashing a house is to provide it with a resilient external façade that will protect against the elements.
Pebble dash homes became common in the early part of the twentieth century as a way to disguise poor quality rendering or cracked brickwork. However, it has many advantages, including excellent water shedding, and the process has been improved and refined over the years.
Preparation
The wall to be pebble dashed needs to be properly prepared to ensure the best possible finish. This will involve examining the wall's condition to determine flatness, surface texture, possible deterioration, or contamination.
Any sign of organic growth, salts, or efflorescence should be removed by dry brushing or if necessary, an appropriate chemical treatment.
If an old render has been hacked off or the underlying wall is very uneven, it will need to be brought up to a uniform level.
Picking the right time to carry out the pebble dashing on your property is very important. The temperature should be above 5 degrees and frost-free, and the weather should be dry but not too hot. Extremes of temperature should be avoided as should periods of prolonged heavy rain.
If there is any doubt about the condition of the wall, then a small sample area should be tested to find the best method and approach. A tap test can determine if there are parts of the wall which are damaged or hollow.
There are products available to deal with most issues for applying render such as fibreglass render mesh, metal lathing and even special dash receiving render.
Scratch Coat
The base coat or 'scratch' coat is applied to form a bond between the wall surface and the new surface, which will be the top coat and dash. A coarse sand and cement mix comprising one part cement to four parts sand as a base coat also covers any blemishes in the substrate. Additives such as PVA, waterproofer or latex may be mixed into this render according to the needs of a particular job.
The wall surface should be dampened to provide suction to the base coat and prevent the moisture being sucked out of the render before it has a chance to cure. A 12mm layer is normal for a base coat. The render is applied with a trowel from a plastering hawk. Once the wall is complete, a straight edge is lightly run over it to level it off and remove any high spots.
At the corners, angle or corner beads are installed to give a sharp edge and are embedded into the render. The angle bead should be checked on both sides of the corner with a spirit level to ensure it is plumb.
To provide a key for the top coat to adhere to a scratching tool is run along the base coat's surface taking care not to go all the way through to the wall. The scratch is done in a wave pattern to achieve the best possible key for the top coat.
Top Coat
Before applying the top coat of render, the base coat should be lightly moistened to prevent the new render drying too quickly and to provide suction. The pebble dash render mix for the top coat should be five parts sand to one part cement with an added plasticiser or similar.
The top coat's thickness should be around 12mm-15mm, and a straight edge is used to ensure a level and even layer. The edge of the corner bead can be used as a guide to the thickness of the top coat of render. The top coat will be applied in small areas as to do a whole wall at once would mean that the render has cured before the pebbles or spar is applied.
An alternative to the traditional pebble dash render is a dash receiver which is specifically designed to be used in pebble dashing. It is a polymer-based cementitious material that is available as a pre-coloured product to match the stones or spar used in the pebble dashing.
Pebble Dashing
The final part of the pebble dashing process is throwing the stones against the top coat of render before it dries. This is usually done by trowel although there are pebble dash sprayers on the market and some tradesmen simply do it by handfuls.
It is done in small sections at a time to avoid the top coat of render drying out and the possibility of the pebble dash not adhering to it. Some plasterers will tamp or press the pebble dash into the top coat after applying to ensure good adhesion and reduce shedding of the stones.
A tarpaulin or container is normally placed under the area being dashed as a significant portion of the pebble dash falls to the ground during application. This is then washed through and recycled. It is important to rinse any dash or spar that has fallen onto a tarpaulin or into a container, so no contaminants end up in the mix.

All windows, doors, and roofline products such as downpipes or guttering should be protected as much as possible while the dashing is going on to prevent damage from the stones. This also applies to alarm boxes, telephone or internet cabling or external lights.
DIY Pebble Dashing
It is perfectly possible for a competent DIY enthusiast who is good at plastering to pebble dash their own house. However, the quality of the finished work may not be the same as it would be if a professional plasterer did the job.
Pebble dashing came into being to hide a multitude of sins such as bad rendering or cracked walls caused by subsidence, so it is no stranger to a lack of skill or finesse.
Hire a Professional or DIY?
For most people, the idea of putting a new type of render on the exterior of their property is to enhance the appearance and increase the value or saleability of their home. With this in mind, it is probably wise to hire a professional plasterer to carry out the pebble dashing on your home.
The problem inherent in doing this job yourself is if it goes wrong, it will be very obvious. If the finish is not good, you could disguise it by painting it, but painting pebbledash is a tricky job, and you may end up highlighting rather than hiding it.
Dangers of DIY
As with all DIY, there are some risks involved in pebble dashing your home. This is particularly the case if you have a two-storey house and you will be working at height. A quarter of all fatalities in construction in 2019/2020 were caused by falls from height and bear in mind that these were professional construction workers.
Therefore, the danger to DIY enthusiasts working at height is even more pronounced as it is unlikely that they will have access to such things as safety harnesses or similar.
Of course, if you want to save some money and do part of the work yourself, then you could take on the preparation such as removing old render and ensuring the walls are clean and sound.
If you decide to take on the complete task of pebble dashing you could save in the region of £2,000-£2,400 for a three-bedroom semi-detached house. However, you will still need scaffolding and the necessary materials which will cost around £3,000.
Tools/Equipment/Safety Equipment
The tools that you will need for rendering and pebble dashing are:
- Plasterer's hawk
- Plasterer's trowel
- Spirit level
- Straight edge
- Safety goggles
- Protective gloves
- Safety boots
You should also have a tarpaulin or container to catch the loose dash that falls to the ground during application.
Building Regulation approval will be needed for pebble dashing your home if more than 25% of the external walls are being re-rendered as this can affect the U value of the building.
Building Regulations and Planning Permission
When considering the cost of pebble dashing your home, it's important to be aware of any building regulations and planning permission that may be required.
Building Regulations for Pebble Dashing a House
The external render of a property is one of the building's thermal elements, and as such any work affecting more than 25% of the building's thermal envelope will require approval. This includes jobs such as re-rendering large areas of pebble dash.
The cost of a building notice will depend on the fees that the local authority charge. However, the average cost is likely to be between £200-£500.
You can look for the list of fees and any other relevant information on your local council website or by calling the local authority's building control department.

Planning Permission for Pebble Dashing a House
Pebble dashing is classed as a form of external cladding, and you will not usually need planning permission to apply it to your home. However, if you live in a conservation area, an Area of Outstanding Natural Beauty (AONB), the Broads, or a National Park, you will need to apply for planning permission to pebble dash your home.
Outside of these areas, you do not need to apply for planning permission if the original render on the property was pebble dash and you are merely replacing what was already there.
If you are pebble dashing an extension, then the original house should have similar material on the external walls. Otherwise, you will need to seek planning permission.
The application fee for planning permission is usually around £200, with slight variations depending on your region. Full details and fee breakdowns can be found on the Planning Portal website.
FAQs
This is one of the reasons why it has a negative reputation. However, it is a very good weatherproofing material and extremely resilient, which is why it was very popular on coastal properties.
However, it is not an easy job and comes with the risk of damaging the underlying brickwork and potentially causing structural damage. It is highly recommended that professional advice is sought before attempting to remove pebbledash from your external walls.
Potentially, a top coat of render that doesn't allow the wall to breathe will create a damp issue. However, there are appropriate dash covering products on the market that will cover the pebble dash without any previous issues.
A scratch coat and top coat should be applied to the depth of the existing render and then apply the pebble dash, which should match the existing. Any areas of render that stand out proud around the edges of the repair can be pushed in gently by dabbing with a large paintbrush.
How to Find & Hire a Pebble Dash Render Specialist
Whether you are re-rendering with pebbledash or matching an extension to the original house, applying pebble dash is best left to a specialist. A pebble dash wall may look like a simple job, but no plastering job is as easy as an experienced plasterer makes it look. Attempting to do it as a DIY job may end up costing you more than hiring a professional in the first place.
Cost
If you are pebble dashing a home prices for professional plasterers will be high on your list of priorities. As with most plastering jobs, it is not one for a DIY enthusiast as the skill required takes years of experience and training. The average cost of hiring a good plasterer will be around £120-£160 per day, although this is likely to be much higher in London and the surrounding areas.
What to Look For
Not all plasterers will carry out pebble dashing as it is not as popular these days, but there are plastering professionals who still do it. The chance of knowing someone who has had pebble dashing work done on their property may be slight, so you may need to look somewhere other than personal recommendations.
Searching for a local pebble dash specialist may help you to see some of their previous work for yourself before you decide. An established business with premises and vehicles is always a good indicator of reliability and professionality.
Qualifications
A City & Guilds or NVQ diploma in plastering is where most professional plasterers will have started. Time served on-site will build on this qualification as they hone their skills and learn the profession's practical side.
Most will work as apprentices under fully qualified plasterers, and many will go on to become master craftsmen. Plastering is one of the most respected trades in construction due to the level of skill required to do a good job.
Experience
When looking for a plasterer to do pebble dashing work, it is important to find out how much experience they have of this particular work. Not all plasterers do pebble dashing so make sure that the person you hire has extensive experience of pebble dashing and ask if you can see some of their previous jobs before committing yourself.
Accreditation
The British Gypsum Certified Plasterer Scheme accepts plasterers who have at least three years of work in residential premises, provide three homeowner references, and pass an on-site assessment by British Gypsum. Members must also have been operating their own business for a minimum of a year and have a minimum of £1 million liability insurance.
Insurance
A pebble dash specialist should have adequate insurance just as any other tradesperson who works in your home. Public liability insurance is the most appropriate for most construction workers. You should ensure that the person you hire to pebble dash your property has insurance cover in the event of injury to people or damage to property. Checking the insurance cover of tradespeople working in your home is your responsibility and in your best interests.
How to Check Qualifications & Certification
In order to check the qualifications or accreditation of a plasterer, you can ask for copies of certificates or the name of the scheme under which they are accredited.
Most professional tradespeople will be happy to provide this information, and it may well be displayed on their paperwork or vehicles.
Checking these qualifications and certifications should be straightforward by contacting the relevant scheme or checking on their website.
Sources
https://www.pegasusplasterers.co.uk/pebble-dashing/
https://pebbledashing.com/inspiration/preparing-for-pebbledashing
https://www.hse.gov.uk/
https://www.planningportal.co.uk/permission/common-projects/external-walls/planning-permission


